Getting rid of nail fungus is only the first step to healthier nails, but it doesn’t stop there — maintaining your nails fungus-free for the long term takes extra work. But many people don’t understand how easily fungal infections come back if they’re not taken when precautions aren’t. No matter how, it’s good to know how to prevent nail fungus after treatment.
Fungal spores love damp, warm environments such as sweaty shoes or a locker room and quickly return unless we have formed good habits. The good news? It’s easy to protect your nails with a few simple steps!
In this article, we take you through the easy-to-do, practical tips so that your nails stay strong, clean, and fungus-free. You’ll learn how to maintain your results — and how not to get reinfected. It’s time to begin to keep your nails healthy for the long haul…
Why Do You Need To Prevent Nail Fungus After Treatment
Successful treatment for nail fungus doesn't guarantee a return to normal. It’s first essential to understand the reasons for recurrence. Nail fungus likes certain conditions, and if they aren’t addressed, there’s a high risk of being reinfected.
How Fungal Spores Survive
Fungal spores are tough. They have a habit of hanging out in your shoes, your socks, and even in nail tools, waiting for the right conditions for them to grow again. Spores can spread quickly in your environment if they are warm, moist, or poorly ventilated, and they can soon reinfect your nails.
Recurrence: Common Mistakes That Lead To Recurrence
- Poor Hygiene: Fungus needs to regrow, which might only be prevented if the feet and nails are regularly cleaned.
- Not Treating Underlying Conditions: Fungus can thrive in the environment provided by any issues such as excessive sweating or Diabetes.
- Skipping Preventive Steps: Some people don’t follow preventive measures such as applying antifungal sprays or powders after treatment.
Addressing the Root Causes
Breaking the cycle means attacking those conditions that allow the fungus to survive. This means keeping your feet clean and hygienic, treating any sweat issues that arise, and sanitizing any things involving your feet.
When you tackle those things, they’re not just fighting fungus. They are preventing that fungus from ever coming back.
Hygiene To Prevent Nail Fungus After Treatment
After treatment for nail fungus, it is essential to keep up good hygiene. Keeping your nails healthy and fungus-free in the long term is simple — and simple means consistent habits.
1. Keep Nails Clean and Trimmed
- Trim Regularly: They are less likely to trap dirt and moisture, so they are less likely to infect with a fungus. Do your nails? Use a sharp and sanitized nail clip for a clean cut.
- Clean Under Nails: If you use a soft brush to clean beneath your nails gently, removing any debris that can harbor fungal spores is also helpful.
2. Wash and Dry Feet Thoroughly
- Daily Washing: wash your feet with soap and warm water, especially if you exercised or wore closed-toe shoes.
- Dry Completely: Fungus love to breed in moisture between your toes. Whether you dry with a towel or not, make sure you do it well, especially in these areas.
3. Use Antifungal Products
- Sprays and Powders: To get rid of lingering spores, use either sprays or powders on your feet and your shoes.
- Moisturizing Wisely: Keeping your feet hydrated is essential, but use lightweight, nongreasy creams that don’t leave excess moisture.
4. Avoid Sharing Personal Items
- Nail Tools: Use your clippers, files, or any other tools; disinfect each of them after every use.
- Towels and Socks: Don't share these items because fungal spores can quickly transfer.
5. Shoe and sock disinfect
- Sanitize Shoes: Away from debris, you need to use antifungal sprays or UV sanitizers to kill spores inside your shoes. Other shoes that they can put in so they can air out completely.
- Proper Sock Care: To kill any remaining fungus, wash socks in hot water with a detergent that’s also a disinfectant. You need breathable, moisture-retaining choices like cotton or bamboo.
6. Monitor Your Environment
- Public Spaces: Be careful at places like pools, gyms, and locker rooms. Protect your feet by wearing waterproof sandals.
- Home Cleaning: Clean floors, mats, and rugs where you’ll be walking barefoot regularly.
By sticking to these hygiene practices, you can create an environment that won’t allow fungus to thrive, and you can get the best treatment results. Be consistent, and in time or willpower, your neurology will get to healthy, beautiful nails.
Tips after treatment To Prevent Nail Fungus After Treatment
What you wear also matters a great deal in protecting your nails from getting fungal infections. Warm, dark, and moist environments are just the place where fungus loves to live—right inside your shoes. There are a few things you can do to reduce the risk of nail fungus returning after getting rid of it:
1. Choose Breathable Shoes
Go for Breathable Materials: Natural materials in shoes like leather or canvas offer better airflow and don’t let moisture buildup accumulate.
Avoid Tight Shoes: Shoes that pinch or don’t let your feet move can trap sweat and moisture, which is a perfect place to develop fungus.
2. Change Shoes Regularly
Rotate Shoes: Rotate between two or more pairs of shoes to allow your shoes to air out. That keeps moisture out of your shoes and helps them dry entirely between wears.
Avoid Wearing the Same Pair Daily: Moisture and fungal spores build up over time when you wear the same shoes every day.
3. Use Antifungal Insoles
Insert Antifungal Insoles: Your shoes will stay dry, and it reduces the danger of fungal growth. These specialized insoles are super helpful.
Replace Regularly: Insoles need replacing every few months to continue to be effective.
4. Disinfect Shoes and Socks
Clean Shoes Regularly: Kill any remaining spores by spraying antifungal disinfectants inside your shoes.
Wash Socks Thoroughly: If your socks are prone to fungus, wash them in hot water and with a good antifungal detergent to get rid of any fungus.
Prevent nail fungus after treatment: Diet and Lifestyle Changes
Nail fungus kills when your body is healthy. Changes to your diet and lifestyle can support your immune system so that you don’t have to be reinfected with the disease after treatment.
1. Nutrition to Boost Your Immune System
- Eat Vitamin-Rich Foods: They contain vitamins A, C, D, and E to help keep healthy skin and nails. Eat citrus fruits, leafy greens, and nuts in your diet.
- Strengthen with Protein: Keratin is the protein that makes up nails. Strong nail growth can be promoted with lean meats, eggs, and legumes.
2. Stay Hydrated
Keeping you hydrated, in general, helps keep your skin and nails healthy, so you have a natural defense against infections. Have 8-10 glasses of water per day.
3. Maintain a Healthy Weight
Nail fungus can result from conditions like poor circulation or diabetes, which result from being overweight. Keep to a regular diet and routine levels of exercise to help with your weight.
Preventing Recurrence of Fungus With Regular Nail Care
To prevent nail fungus from returning after treatment, it’s essential to have consistent nail care. To keep your nails healthy and create a barrier against future infections, you need to have a proper routine.
1. Trim Nails Properly
Use the Right Tools: Never use dirty, dull nail clippers. Don’t share tools with others.
Cut Straight Across: Nails trimmed straight across reduce the chance of getting ingrown nails, which can be entry points for fungi.
File Rough Edges: Take a nail file to smooth out rough edges they might otherwise catch, trap dirt in, etc.
2. Avoid Nail Injuries
Wear Protective Shoes: Protective shoes can protect your nails from things that go flying or take heavy pieces with them.
Be Gentle: Don't get overly aggressive manicures or pedicures that can harm the nail bed and open it up to infection.
3. Moisturize, but not Overdo It
Focus on Balance: A dry nail is inclined to crack, and excess moisture may feed the fungus that grows on the nails. A lightweight, non-greasy moisturizer for nails.
Apply Daily: Moisturize every day to keep nails healthy and strong.
4. Avoid Nail Enhancements
Skip Artificial Nails: Fake nails and acrylics can trap moisture that then causes a home for fungus.
Limit Nail Polish: Take breaks from polish, especially if you’ve just overcome some kind of infection, to let your nails breathe.
5. Disinfect Tools and Surfaces
Clean Nail Care Tools: Avoid touching your mouth or hands afterward, and store clippers, files, and tools in a clean place where they can only be used after disinfecting with alcohol or boiling water after each use.
Keep Nail Stations Clean: Sanitize the surfaces and tools used for nail care wherever you do it — at home or even at a salon.
6. Inspect Nails Regularly
Check for Early Signs: You’ll also be watching for discoloration, thickening, or a change in texture that may indicate the fungus is becoming persistent.
Seek Professional Help If Needed: If your recurrence is detected first, consult a professional.
If you take proper nail care seriously, you can ensure there are no blurs in the results of your treatment and get long-lasting, healthy nails. The best thing you can do to prevent fingernail fungus from receding is to remain consistent with your treatment.
Environmental and Habitual Additions to Avoid Nail Fungus
You can lower your risk of getting nail fungus to return after treatment by creating a fungus-free environment and following good habits. Making small changes in your surroundings and behavior will help protect your nails.
1. Keep Your Home Clean
Sanitize Common Areas: Clean floors, carpets, and rugs regularly, especially on the floors you walk barefoot.
Disinfect Bathrooms: If you are prone to athlete’s foot, pay extra attention to bathroom floors and mats and use antifungal sprays or bleach-based cleaners.
Ventilate Shoes Properly: Don’t store shoes in closed, humid areas that encourage fungal growth.
2. Barefoot Walking in Public Isn’t Something You Should Be Doing.
Wear Protective Footwear: When you're in gyms, pools, or anywhere else using communal areas such as public showers, wear flip-flops or waterproof sandals, as they'll help lower your chances of exposure to fungal disease.
Keep Feet Covered at Home: Also, use slippers or clean socks to avoid direct contact with floors if you’ve had a previous infection.
3. Practice Good Laundry Habits
Wash Towels and Linens Frequently: Clean your towels, socks, and bedsheets using hot water to kill fungal spores.
Separate Laundry: Separate laundry items that you touch your feet with, such as socks and shoes, to stop the fungus from spreading.
4. Disinfect Shoes and Socks
Use Antifungal Sprays: Antifungal sprays can also be used to kill fungi in your shoes after each use.
5. Invest in Antifungal Products
Use Treated Mats: Put antifungal-treated mats in high-risk spots like bathrooms.
Antifungal Powders: Drench these in shoes or on your feet before socks and wear them to offer more protection.
Ensuring your nails stay fungus-free in the long term is to keep your environment clean, together with building healthy habits. There is no end to the prevention, but these steps can minimize your chances of recurrence dramatically.
Why Follow-Up Appointments are Important To Prevent Nail Fungus After Treatment
After successful treatment, nail fungus can come back unless there are help appointments for follow-up. After all, your performance can be professional, and someone can monitor your progress, provide additional tips, and handle any remaining problems.
- Monitor Nail Health: Sometimes, the nail fungus can hide below the surface or come back without looking like it first did. It’s all gone, but only with regular checkups.
- Prevent Recurrence: This can help a potential patient identify potential risks or habits that may expose them to reinfection and advise how to prevent this.
- Address Side Effects: Follow-ups are also necessary if you are taking oral medications for nail fungus, as side effects from these medications can be managed and overall health monitored.
When Should You Schedule Appointments?
- Initially After Treatment: When you’ve finished your treatment, schedule a visit 4—6 weeks later to make sure the infection has cleared.
- Ongoing Monitoring: It’s also essential to follow the advice of your doctor and go for a check-up 3–6 months after the time if you are likely to develop fungal infections.
- Visual Examination: If you have a history of recurrence, your doctor will look for changes in the appearance of your nails, such as discoloration or thickening.
- Lab Tests If Necessary: A small nail sample may be tested for fungal spores if there is some doubt that the infection will fully resolve.
- Preventive Recommendations: If your nails become lost and the beds don’t heal, then your doctor may prescribe more potent antifungals and perhaps suggest stronger over-the-counter products or even drops, as well as prescribe prescription strength antifungal creams to keep your nails healthy
For people with conditions such as diabetes or poor immunity, regular podiatrist visits are essential. Having these specialists is to prevent complications from occurring or have healthy feet and nails.
The Combination of Professional Guidance with Self-Care
Consistent at-home preventive measures paired with follow-up appointments work best. Let your doctor know what you do for nail care and receive specific advice to improve it further.
Proactive follow-ups make sure your treatment sticks and prevents minor issues from becoming big problems. Regular monitoring is also a great thing to do to keep your nails healthy and free of fungus.
Why to Choose Revitalize London To Prevent Nail Fungus After Treatment
Revitalize London offers our advanced and personalized nail fungus treatment solutions. Our professional team of doctors has some modern methods of treating this disease, such as oral medications, laser treatments, and topical therapies, which yield efficient and effective results.
For people with persistent infections or those with underlying conditions such as diabetes, we know the importance of maintaining healthy nails. To help you achieve long-term nail health and avoid reinfection, we give you tailored aftercare advice.
Once in the Revitalize London care, your care doesn’t end at the treatment. Taking a sensible approach can go a long way. We give detailed post-procedure guidance and recommend soothing skincare products so that your sensitive skin can heal as quickly and as comfortably as possible.
An established favorite for professional skincare, Revitalize London has years of experience treating all skin types. We would like to help you have clearer, healthier skin in our welcoming, professional environment.
For safe and compassionate care, trust Revitalize London. This is the beginning of your journey to healthy, fungus-free nails!
Wart removal for sensitive skin
Wart Removal for Sensitive Skin: Best Options and Safety Tips
Meta-description: Learn about what warts are, the best methods for wart removal for sensitive skin, the aspects to consider before and after the treatment if you have sensitive skin, and some other helpful information.
When your skin is sensitive, dealing with warts is frustrating. However, warts — caused by the human papillomavirus or HPV — can appear anywhere on the body, and not every wart is easy to remove. Depending on sensitive skin, finding the proper method to remove warts is essential to avoid irritation and damaging the skin further.
Treatments for sensitive skin need special care and attention, and it’s essential to understand what treatments will not damage sensitive skin just as much as they help. In this article, you’ll learn the best wart removal choices for delicate skin and tips to protect from complications while being treated. Whether you’re on the hunt for home remedies or professional treatments, you’ll find skin solutions that work for your skin type. Let’s dive in!
Sensitive Skin and Warts
When your skin is sensitive, it is easier to irritate, red, and inflamed when you come in contact with specific products or treatments. If you have sensitive skin, it’s crucial to make sure that the wart removal method you use won’t make your skin react unpleasantly. Harsh chemicals, rough textures, or intense treatments can all be too much for sensitive skin, meaning it’s more likely to have adverse side effects.
Small growths caused by the human papillomavirus (HPV) are known as warts. For the most part, they are harmless, but they can be unattractive and occasionally painful. Some people may have more discomfort during the removal process or even suffer from longer-term irritation following treatment.
The first step is to understand your skin type and the nature of the warts in question you want to treat. Warts may be small to large, located almost anywhere on the body, and cause varying degrees of discomfort.
But how do you remove a wart safely without causing sensitive skin to become irritated? So, let’s see what the best option is next!
Best Method for Wart removal for sensitive skin.
When it comes to Wart removal for sensitive skin, it has to be done very carefully to avoid irritating or damaging the surrounding skin. To your relief, there are treatments of all kinds that can be gentle and also effective. We’re going to take you through the best wart removal methods specifically for people with sensitive skin, as shown below.
Over-the-Counter Treatments
The first thing people start with is over-the-head wart removal treatments since they are easy and convenient. The active ingredients in these products are generally salicylic acid or a cryotherapy spray that is meant to remove warts at a slower rate.
How It Works: Softening and eventually breaking down the wart tissue through time is what salicylic acid does. The active ingredient hits the keratin inside the wart and dissolves it, allowing the wart to fall off itself.
Why It’s Ideal for Sensitive Skin: Salicylic acid is easily accessible in concentrations suitable for sensitive skin. Types are gels, creams, and pads to give more control. But it's essential to use a lower concentration when you begin.
How to Use: Put a small amount onto the wart and cover the surrounding skin with petroleum jelly to reduce the possibility of irritation. For several weeks, you’ll need to repeat the process until the wart disappears.
Pro Tip: Patch test the product before applying it to the wart. Now, your skin won’t rebel and have a negative response.
How It Works: The sprays work by freezing the wart, using a mixture of dimethyl ether and propane that kills and shrivels the tissue, and it falls off.
Why It’s Ideal for Sensitive Skin: Professional cryotherapy treatments use liquid nitrogen; cryotherapy sprays are much gentler. The formulation of these at-home sprays also has minimal irritation to the adjacent skin.
How to Use: Use the spray to apply to the wart directly as directed. The wart should freeze and fall off after a number of applications, though these can take anything from a few days to a couple of weeks.
Pro Tip: Do not spray the solution on non-wart areas of the skin. Then, apply your product to the location where you want it to go, using a cotton swab to limit the area.
Treatment by freezing – also known as cryotherapy.
Cryotherapy is one of the most common types of treatments for wart removal, including for very sensitive people. Freezing of the wart with liquid nitrogen destroys the tissue so that it breaks down and falls off in a few days.
What It Involves:
A healthcare professional does this with liquid nitrogen to freeze the wart. The procedure is rapid and works by damaging enough of the wart’s cells that it disappears. A blister forms around the wart after it has been frozen, and the wart comes off within a few days.
Why It’s Ideal for Sensitive Skin:
While cryotherapy involves freezing the wart, if performed correctly, this safe and effective option is acceptable for people with sensitive skin. The trick is to apply the freezing agent just right so it hits only the wart tissue, not the surrounding skin.
How to Use:
For those of you with sensitive skin, cryotherapy for wart removal should never be attempted at home and ideally shouldn't be done even by a trained professional. Exposure to liquid nitrogen can be irritating or even frostbite. The size and location of the wart may determine if it’s treatable in one session or may require multiple sessions.
Pro Tip: Side effects of cryotherapy include mild discomfort and redness after the procedure, but each should be short-term. Soothe the skin post-treatment with aloe vera gel.
Laser Wart Removal
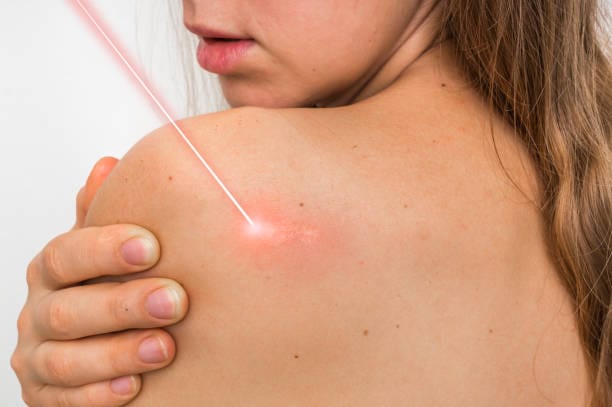
Laser wart removal is an advanced method of treating warts by using a focused beam of light that damages the wart tissue. Being minimally invasive and precise, it’s an excellent option for people with sensitive skin.
What It Involves:
If the treatment is done with a laser, a trained dermatologist uses the laser to highlight the wart, which consequently kills the wart’s blood vessels and causes the tissue to die. It's a very controlled process, and the doctor is able to avoid damaging the surrounding skin.
Why It’s Ideal for Sensitive Skin:
This laser removal procedure is a non-invasive one that usually has minimal to no irritation to the skin. Because the focused light energy is only applied to wart tissue, oversensitivity to surrounding sensitive areas is minimized. This treatment is perfect for deep and treatment-resistant warts.
How to Use:
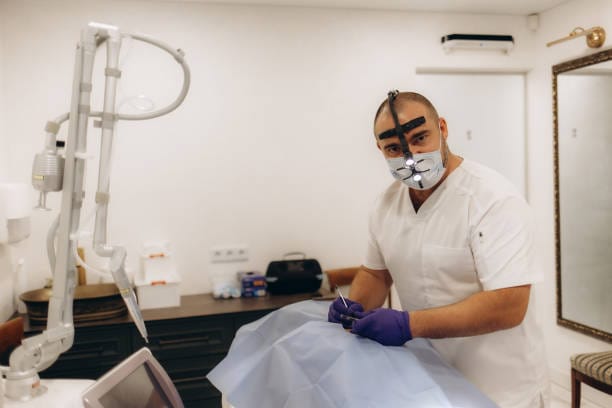
Laser wart removal is done in a dermatology clinic or even in a unique medical setting. The procedure is quick, usually taking 15 – 30 minutes, depending on how many and how large the warts are. During the procedure, some mild discomfort occurs, but most patients find it tolerable.
Pro Tip: If warts are more extensive or more stubborn, several treatments may be necessary. Your dermatologist may tell you to use a mild moisturizer or ointment after the procedure to keep the skin moist and to relieve any inflammation.
Natural Wart Removal Remedies
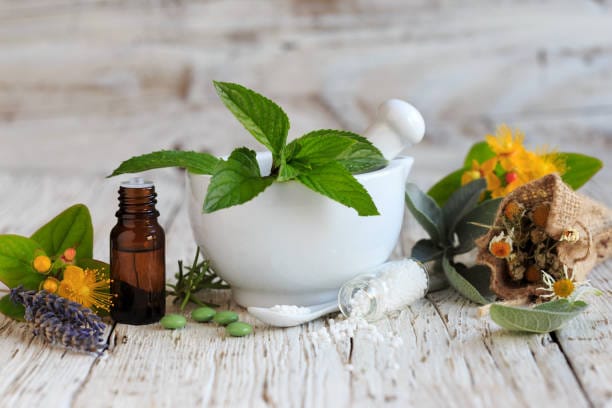
Those with sensitive skin and those preferring a more natural approach can use several home remedies for wart removal. Gentler on the skin, but they may need to work more quickly, are these methods.
How It Works: You know that apple cider vinegar is acidic, so it should help break down the wart tissue. Acid from the vinegar may dry out the wart and make it come off.
Why It’s Ideal for Sensitive Skin: A natural remedy, the apple cider vinegar is often not as harsh a chemical. Yet it’s best not to use the vinegar straight away as it can irritate.
How to Use: Dilute apple cider vinegar on a cotton ball and put it on the wart. You apply a bandage covering it overnight for a couple of days, continuing the process until the wart is gone.
Pro Tip: Don’t use vinegar straight on the skin because it can lead to irritation; always dilute the vinegar with water (1:1 ratio).
How It Works: It is well known that Aloe Vera possesses properties that cool off and heal inflammation, which is why it’s the ideal cream for sensitive skin. Not only may it reduce irritation and help promote healing, but it also helps reduce the wart.
Why It’s Ideal for Sensitive Skin: It’s gentle and should keep the skin calm, therefore making aloe vera an ideal choice for delicate areas.
How to Use: After that, apply fresh aloe vera gel to the wart and leave it on for 15-30 minutes before you rinse it off. It should be repeated twice a day for the best results.
Pro Tip: Be sure to use a pure aloe vera gel that’s entirely additive and fragrance-free.
How It Works: The very antibacterial and antiviral properties of tea tree oil will get to work against the exact virus causing the wart. It also has a drying effect that could help clear the wart out a little at a time.
Why It’s Ideal for Sensitive Skin: Ingestion of tea tree oil is potent, but it's gentle when diluted correctly, which may make it a good choice for sensitive skin for that reason.
How to Use: If you have tea tree oil, mix it with a carrier oil and rub it onto the wart. Wash it off, but leave it on for several hours or overnight.
Pro Tip: Make sure to patch-test tea tree oil before you use it on larger areas. To see if your skin will react.
Wart removal for sensitive skin —Safety Tips
For those with sensitive skin, safety is a priority when removing warts. If you’re not careful, even the most gentle treatments can irritate. Below are practical safety tips to help you have successful wart removals and, at the same time, keep your skin protected.
Product patch test first.
Such skin is vulnerable to reactions -- so always patch-test any treatment or remedy you apply.
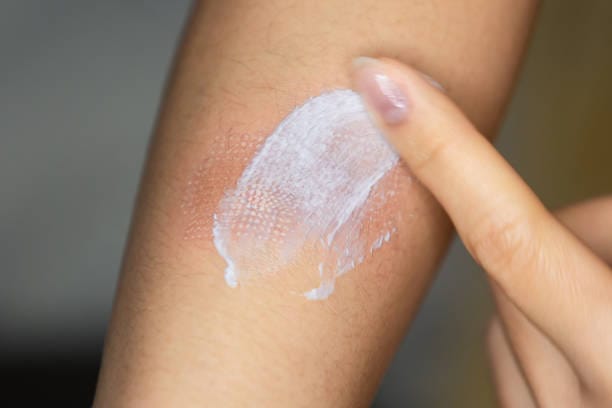
How to Patch-Test: Lightly apply a small amount of the product to some healthy skin (such as the inside of the forearm). Redness, itching, or irritation can occur one day or more after nanochemistry treatment; check after waiting 24–48 hours.
Why It’s Important: The use of patch testing can prevent established reactions to applying treatments directly onto the wart.
Protect the Surrounding Skin
For those with sensitive skin, the area around a wart is in itself as important as the wart itself.
How to Protect: During treatment, shielding the skin around the wart with petroleum jelly or a barrier cream is a good idea. It reduces the chance of exposure to harsh ingredients by accident.
Pro Tip: If using adhesive patches, be sure they stick only to the wart and not to sensitive skin.
Follow Instructions Carefully
For both over-the-counter treatments and professional services, whichever way you use them, make sure you do it exactly according to the given directions.
For OTC Products: Take just the dosage and frequency as advised. Using treatments too much can cause skin to become damaged or irritated.
For Professional Treatments: Make sure you know what post-treatment care is, keeping the treated area clean and hydrated.
Don’t Scratch or Pick at Warts
While we might find scratching at warts tempting, it can actually make things worse.
- Why Avoid It: You can pick at warts, but this spreads the virus to other parts of your body or causes an infection. On sensitive skin, however, this can be more irritating and cause scars to form.
- What to Do Instead: Bandage or patch the wart to keep from accidentally rubbing the wart.
If in Doubt – Choose professional treatments.
When OTC products or home remedies don’t work, the safest thing to do is to consult a dermatologist.
- Why It’s Better: Treatments can be tailored by professionals according to your skin type, so they know that treatment will remove the wart without affecting delicate areas.
- What to Ask: Bring your concerns, as well as options such as cryotherapy or laser removal, to discuss.
Be Patient and Consistent
For people with sensitive skin, wart removal can take a while. Rushing the process or switching treatments too much can be worse than good for your vitamin D levels.
- Stick to a Plan: Change one method at a time over a few weeks before deciding if they have a good or bad effect.
- Gentle Persistence: Treatments for sensitive skin have to be slower and gentler to avoid issues.
After Treatment: Hydration and Moisturization
When you remove your warts, it’s essential to keep your skin moisturized so that it can recover properly and to help prevent your skin from becoming dry.
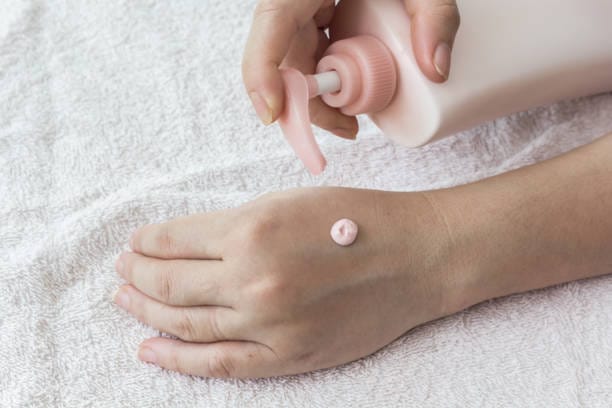
- Use Gentle Products: Go with unscented and hypoallergenic moisturizers suitable for sensitive skin.
Pro Tip: After treatment, apply a soothing cream that contains aloe vera, or chamomile extract to alleviate redness or irritation.
Schedules for Post-Treatment Care for Sensitive Skin
Whatever is causing your warts to look like they do, you’re going to need to take appropriate measures to make sure they don’t come back in the forms that make you uncomfortable and embarrassed at the end of the day. Treatment care is needed in the days following to minimize irritation and reduce the risk of scarring and recurrence. Now, let’s look at some ways you can help smooth your recovery.
1. Keep the Area Clean and Dry
Hygiene is the first thing to heal.
Why It’s Important: If the wart is removed with surgical or chemical agents, cleanliness prevents infections.
How to Do It: Gentle, lukewarm water and a mild fragrance-free cleanser can be used to wash the area. Dry it with a clean towel pat.
2. Avoid Sun Exposure
Sensitive 'healing' skin may be irritated by direct sunlight.
Why It’s Important: The darkening of scars or redness in treated areas can be caused by UV rays.
Protective Measures: If you can, put loose clothing over the affected area or use a broad-spectrum sunscreen with SPF 30 or higher.
3. Soothing Ointments or Creams can be used.
After wart removal, it is recommended that you care for sensitive skin extra carefully.
Recommended Products: Calendula cream, healing ointments recommended by a dermatologist, or aloe vera gel.
Application Tip: Rub gently until the treated skin isn’t irritated.
4. Avoid Harsh Skincare Products
For the healing phase, avoid products that contain alcohol, acids, or strong fragrances.
Why It’s Important: But these can cause irritation and slow down the recovery.
What to Use Instead: Choose hypoallergenic, non-comedogenic, gentle on sensitive skin products.
5. Monitor Signs of Infection.
It is essential to look for any unusual symptoms.
Signs to Look For: Sometimes, it might get red and swollen, fill with pus, and become more painful.
What to Do: If these symptoms occur, see your dermatologist immediately.
6. Maintain Regular Follow-Ups
If your skin’s too sensitive, periodic check-ins with a dermatologist ensure the treatment is effective and healing is on track.
What to Ask: Talk about what they are doing to help skin heal and prevent future warts.
Choosing Wart Removal on Sensitive Skin with Revitalize London
At Revitalize London, we provide gentle, effective treatments for sensitive skin. Our expert dermatologists understand the problems of getting rid of warts without irritating sensitive skin, and every procedure is designed to focus on your comfort and safety.
Sensitive Skin Tailored Treatment
From a safe topical solution to cryotherapy, advanced wart removal options, and laser therapy, we are able to provide the most advanced wart removal options. We take the time to make sure that your skin's specific needs are going to be met by our meticulous assessment and designing your personalized treatment plan for results.
Smart Technology
We use the most recent tools and techniques to perform precise, minimal invasive wart removal procedures. These are methods to minimize the possible discoloration, irritation, or scarring.
We are happy to contact you today to schedule your consultation and wart removal, especially for your sensitive skin!