Effective Plantar Wart Removal: EffectivTreatment Options and Tips for Success

Plantar wart removal

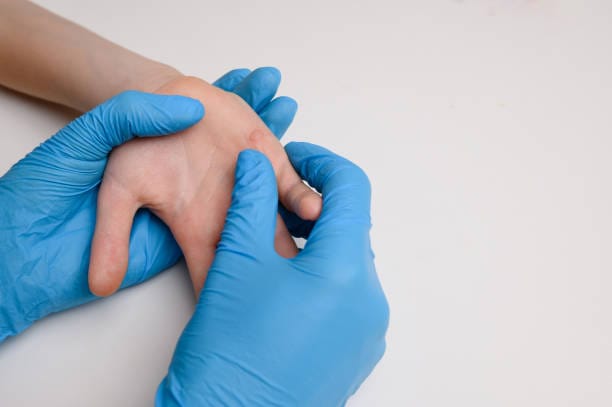
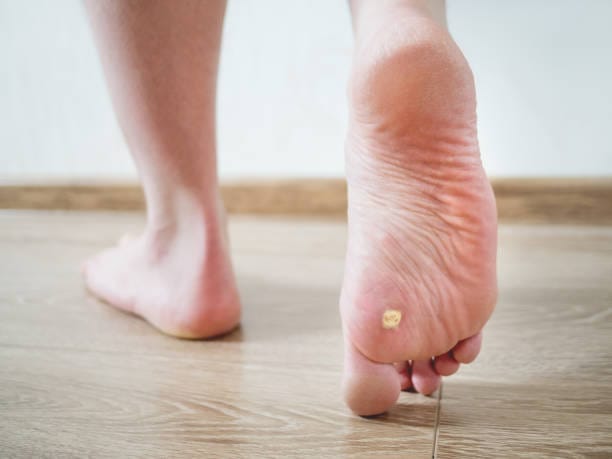
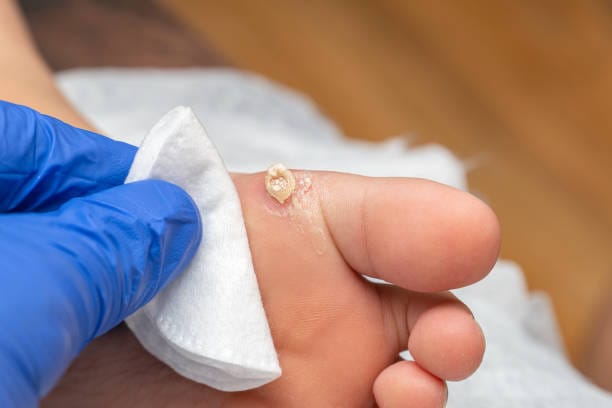
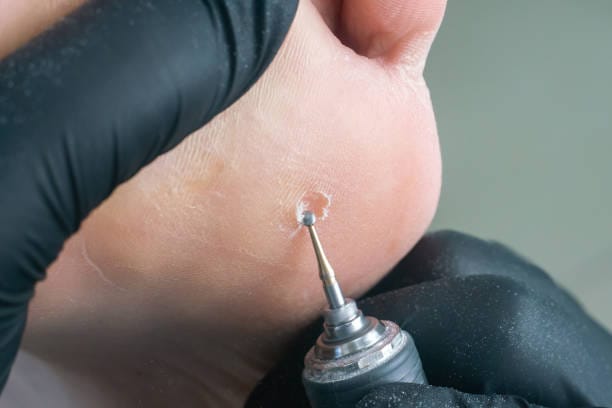
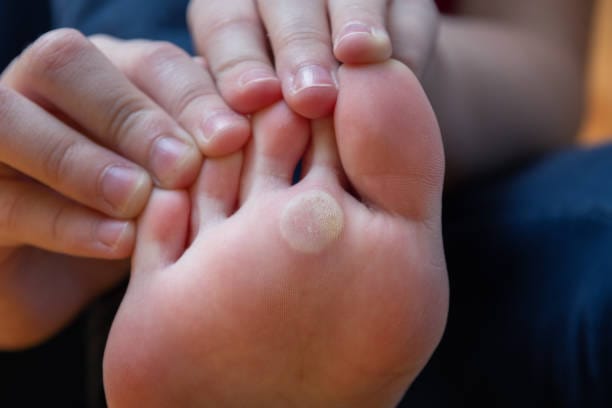
Plantar wart removal can be a never-ending battle. What are these stubborn, painful growths on the bottoms of your feet? They make walking and standing difficult. Plantar warts are caused by the Human Papillomavirus (HPV) and become infected when the virus enters through tiny cuts or cracks in the skin. When they have properly developed on the surface, they grow inward because of the pressure of body weight and can form hard, callused spots that can be hard to treat.

Plantar wart removal isn’t always easy. Most over-the-counter solutions only give temporary relief; improper care can cause recurrence. If left untreated, plantar warts will spread, causing more discomfort.

The good news? You don’t have to put up with it. No matter what kind of treatments are on your go-to list for Plantar wart removal, knowing how to remove a plantar wart is the first step to finding a solution that works. So, let’s delve into the best ways to beat this challenge and have your feet free from warts.

 What Causes Plantar Warts?

Human Papillomavirus (HPV) causes plantar warts. This common virus enters the skin through small cuts, scrapes, or weak points. It grows in warm, damp areas like public showers, locker rooms, and swimming pools, the most common places where the virus can pass from one person to another.

Once HPV has infected the skin, its cells grow surprisingly high rates, leading to a hard, grainy growth known as a plantar wart. Many, if not all, plantar warts tend to grow inward because of pressure on the parts of the feet where they would grow, such as the heel or ball.

How Does HPV Spread?

HPV is highly contagious. Infection results from direct contact with a plantar wart or surfaces contaminated with the viruses (such as floors or towels). One of the most common ways to get plantar warts is to walk barefoot in public places.

Plantar Wart Removal Risk Factors

Not everyone is at higher risk for plantar warts. Factors that increase your risk include:

  • Weakened immune system: It is harder to overcome HPV because of a less effective immune response.
  • Frequent exposure: Visiting some public swimming pools or gyms or going to public showers regularly.
  • Damaged skin: these small cuts, blisters, or cracked heels form an entry point for the virus 

The first step towards winning the fight against plantar warts involves understanding what causes them. The good news is that you can reduce the need for plantar wart removal in the future if you can avoid known risk factors and maintain good hygiene.

Plantar wart removal Common Symptoms 

You can look it up and identify the plantar wart or evaluate it by noting the signs and symptoms. If you know what to look for, you can address the issue before it gets out of control.

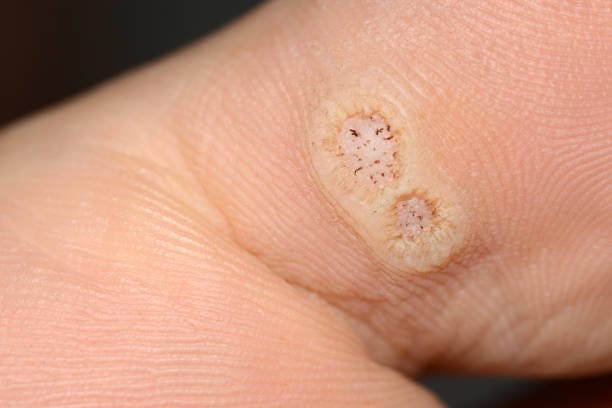
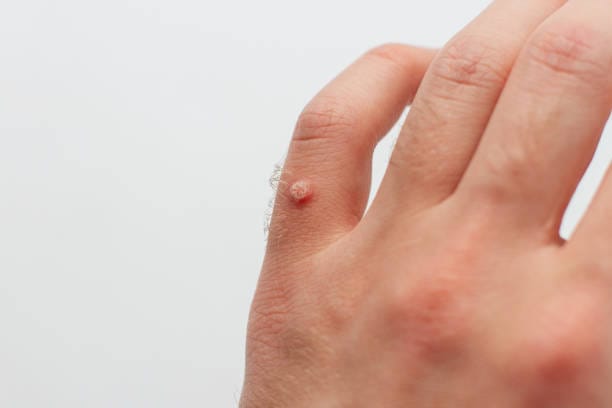
  • Hard, grainy growths: Plantar warts, which have a rough texture, usually appear on the soles of the feet.
  • Black dots: Inside the wart are tiny black nuts, or ‘wart seeds.’ They are clotted blood vessels.
  • Pain or tenderness: A plantar wart can be uncomfortable when you walk or stand on it, especially when that part of the foot bears more pressure, such as at the heel or ball.
  • Callused skin: Body weight pressure can push the wart inwards, resulting in thick, callused skin covering it.

Plantar Warts vs. Other Foot Issues

Plantar warts are easily confused with corns, calluses, or blisters. But unlike corns and calluses, plantar warts upset the skin's natural lines. However, consult a professional about plantar wart removal if the growth is painful and does not heal.

When to Seek Help

Professional intervention is often the best solution if plantar warts persist, multiply, or cause severe pain. Treatment as soon as needed reduces the risk of spreading and helps you become comfortable and mobile again.

Plantar Wart Removal Over The Counter Remedies 

Over-the-counter (OTC) treatments are the first defense against plantar wart removal. These solutions are easy to use, inexpensive, and available to many people, making them popular for stubborn warts.

1. Salicylic Acid Treatments

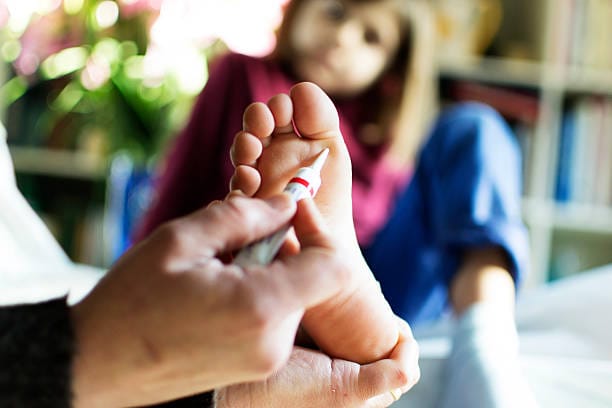
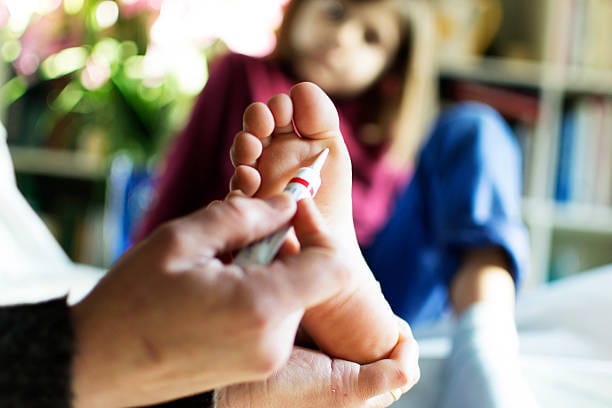
The most commonly used plantar wart removal ingredient is salicylic acid. This acid softens the tissue of a wart in gels, on medicated pads, and liquids. This works for plantar wart removal by simply peeling away the tissue over time.

How to Use:

  • Salicylic acid should be applied directly to the wart daily.
  • Warm water to add before you soak your foot will soften the skin.
  • When they are effective, they are enhanced by gently filing the wart with a pumice stone 

Pros:

  • Super affordable, and it’s a versatile solution 
  • The effects are generally gradual yet effective.

Cons:

  • It’s something that needs to be applied repeatedly over weeks or months.
  • It may irritate the surrounding skin.

2. Cryotherapy Kits (Freezing Sprays)

OTC cryotherapy kits mimic the way dermatologists get cold. These sprays use liquid nitrogen or other freezing agents to destroy wart tissue.

How to Use:

  • The freezing spray is applied directly to the wart according to package instructions.
  • If the condition suggests so, repeat it every two to three weeks.

Pros

  • The process is relatively simpler than some other treatments for plantar wart removal. 
  • The effects show up faster

Cons:

  • It’s not as powerful as professional cryotherapy.
  • It may not work for very deep-rooted or large plantar warts.

3. Adhesive Pads and Tapes

Salicylic acid-medicated adhesive pads are a convenient way to remove Plantar warts. Some people swear by duct tape therapy, which covers the wart to suffocate it and stimulate an immune response.

Pros:

  • Quite easy and inexpensive.
  • Non-invasive and low risk.

Cons:

  • Results may vary by person and take time.

The Verdict on OTC Remedies

Plantar wart removal using OTC remedies is a good starting point, but it won’t be an exaggeration to say that it might take quite a long time. If warts refuse to go away or cause pain after several weeks, it's time to consider professional treatment to remove them permanently.

Plantar Wart Removal With Professional Treatments 

Professional treatment is also possible when over-the-counter remedies fail to help you remove Plantar warts. Seek expert care if your plantar wart is difficult to treat, keeps coming back, or leads to painful complications.

Plantar wart removal
  1. Professional Cryotherapy

One of the most common professional treatments for plantar warts is cryotherapy or wart freezing. Liquid nitrogen is applied directly to the wart, freezing the tissue and killing it off. After a while, the body naturally throws off the wart.

How It Works:

A dermatologist or other healthcare provider temporarily applies liquid nitrogen (or carbon dioxide) to the wart.

Freezing can form a blister around a wart. Then the wart drops off.

Pros:

  • Stubborn warts can be targeted with this Plantar wart removal treatment
  • Quick and minimally painful.

Cons:

  • Bigger warts may need several sessions.

It takes some healing time. Discomfort and blistering can occasionally accompany it.

2. Electrosurgery: Burning Off the Wart

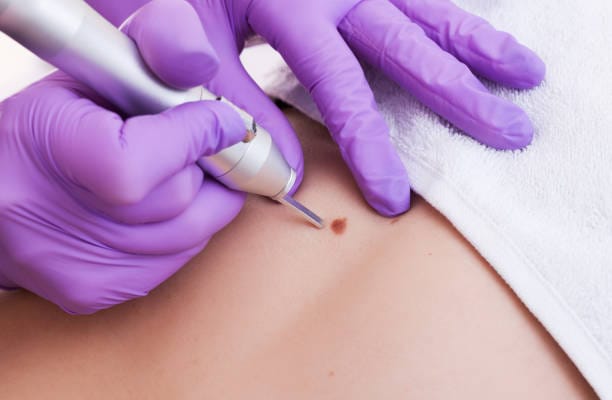
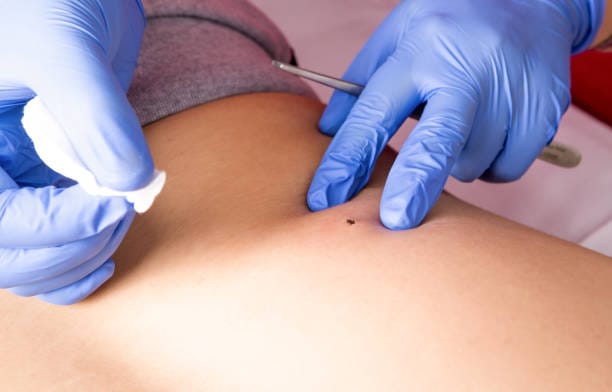
This form of electrosurgery uses high-frequency electrical currents (diathermy) to burn off the wart. It is good for larger, deeper plantar warts.

How It Works:

  • A small application of electric current destroys the wart.
  • The procedure is usually done under local anesthesia.

Pros:

  • Use on deep or resistant plantar warts.
  • Lower chance of recurrence with immediate results.

Cons:

  • Healing requires a few days and will leave a small scar.
  • It can make you uncomfortable afterward.

3. Laser Therapy

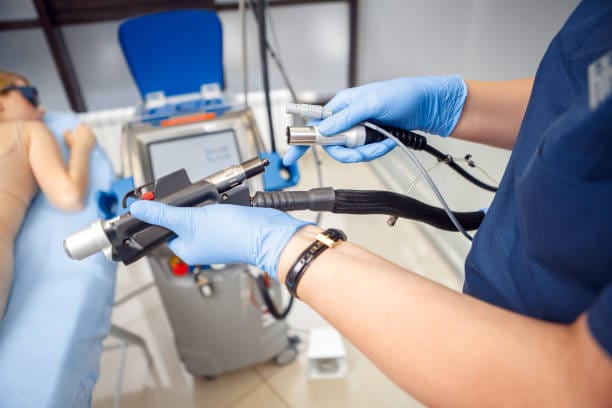
Laser therapy is a new way for Plantar wart removal with focused light directed at destroying wart tissue. Other treatments have failed, and it’s often recommended.

How It Works:

  • Doctors will use the laser to vaporize the wart tissue, leaving the surrounding skin untouched.
  • The vaccine also helps trigger your immune system to fight against the HPV virus.

Pros:

  • It is very effective, especially on recurring or hard-to-remove warts.
  • Minimal risk of scarring.

Cons:

  • More expensive than other treatments.
  • Complete removal may take just a few sessions.

4. Immunotherapy

It won’t treat persistent or recurrent plantar warts, but immunotherapy is still an option. Stimulating the body's immune system to fight HPV infection makes up this treatment. These species can be induced into an immune response by injections or topical agents.

How It Works:

  • Instead, it is applied or injected directly into the wart, an immune-boosting substance.
  • It helps to encourage the body to attack and destroy the wart tissue.

Pros:

  • It’s effective for warts that don’t respond to other treatments and keep returning.
  • Minimal side effects.

Cons:

  • It may take many sessions.
  • Often causes mild irritation at the site of treatment.

5. Surgical Excision

Surgical excisions are rarely needed, even if the plantar warts are deep, large, or resistant to other treatments. In this procedure, the wart tissue of the foot is cut out.

How It Works:

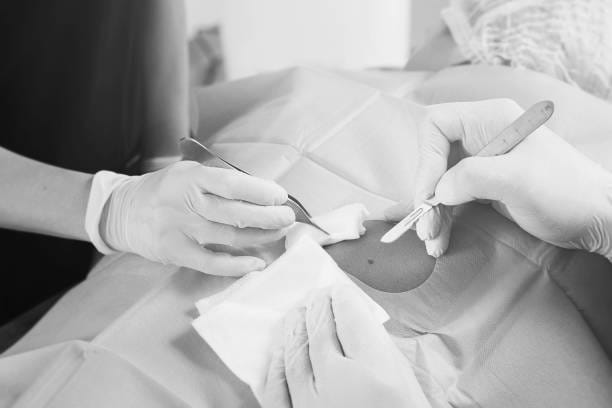
  • The wart is removed surgically after local anesthesia is applied.
  • Warts can vary in size and location, so your doctor may advise stitches.

Pros:

  • It offers a permanent cure for hardy plantar warts.
  • Good for warts that won’t go away with other treatments or are larger.

Cons:

  • It may leave a scar, requiring time for recovery.
  • Riskier than non-invasive methods.

What Treatment Do You Need For Plantar Wart Removal?

As with any health issue, there are a variety of potential options available for Plantar wart removal, and with the help of your doctor, you can ideally pick one. Like this, it’s easier to find what is best for you based on size, depth, location, and so forth, as well as your overall health and preferences. Consult a dermatologist or foot specialist, and he can recommend the most effective approach.

Preventing Plantar Warts: Avoid Recurrence Tips

Plantar wart removal may be effective, but at the same time, you need to follow some tips to prevent the recurrence of warts. This helps you maintain healthy, wart-free feet. Below are some practical tips on skipping future outbreaks and being less likely to acquire plantar warts.

plantar wart removal

1. Practice Good Foot Hygiene

One of the best preventive measures against plantar warts is keeping your feet clean and dry. Since the HPV virus lives in moist environments, you must wash your feet regularly and ensure they’re entirely dried. It’s important to pay special attention when washing between your toes.

  • Wash your feet every day with soap and water.
  • Do not let your feet become moist, especially between the toes.
  • Keep your feet dry in a warm, humid area by using antifungal powders.

2. Wear Protective Footwear

Wherever you won’t want to step barefoot—at the pool, in the locker room, at the gym, or in the showers—wear flip-flops or water-resistant shoes to protect your feet from HPV exposure. Don’t walk around barefoot to avoid the virus.

3. Direct Contact with Warts must be avoided.

Direct contact with warts, whether you or someone else’s, should be avoided. HPV is very contagious, and there is no cure, so do not touch warts. Cover them with a bandage in case you spread the virus to others.

  • Towels and footwear aren’t something you should share with someone who’s got warts.
  • Put a waterproof bandage over your wart until it’s fully healed.

4. Strengthen Your Immune System

Building a strong immune system can help fight the HPV virus and prevent wart formation. A balanced diet, regular exercise, and stress control can aid the immune system, enabling it to fight off viruses like HPV more easily.

5. Treat New Growths Quickly

Be sure to get treated if you see any new growths or spots. Prompt treatment can assist in preventing the growth and spread of the wart and, in the process, prevent the need for intensive plantar wart removal treatments.

Following these tips will reduce your chance of having plantar warts and eliminate the need for repeated treatments. Maintaining your feet wart-free will require extensive preventative care.

How to Tell When It’s Time to Seek Professional Help for Plantar Wart Removal 

Most plantar warts respond to over-the-counter treatments and home remedies, but some require professional assistance. Knowing when to seek expert treatment can prevent complications and quickly secure faster, more effective solutions for stubborn warts.

1. Persistent or Painful Warts

If weeks of at-home treatment fail to cure your plantar wart or is painful, it’s time to see a health professional. If your warts are causing discomfort or spreading despite your efforts, you may need stronger, more targeted treatment.

2. Multiple Plantar Wart Removal

Home treatments can become difficult if you get multiple warts on the same foot or in different parts of the body. When all warts are not completely wiped out, a doctor can help assess the situation and give the exact treatment to remove the warts.

3. Deeper or Larger Warts

The large or deeply embedded plantar warts need professional treatments like electrosurgery laser therapy. They can tackle warts that won't go away with OTC treatments more effectively.

4. Recurring Warts

The HPV virus is one cause of plantar warts, and if you have to have it cut off again and again, it could mean that the virus is still active in your system. If a patient responds poorly to conservative treatments for hepatitis C, a healthcare provider may suggest more advanced treatments to help with long-term relief and a reduced chance of recurrence.

5.  Compromising Mobility 

Professional intervention will be needed if the wart prevents you from walking or causing much pain. Plantar warts, left untreated, can worsen and become uncomfortable walking in and otherwise doing daily activities.

If you catch the plantar wart early, a professional's help can save you time and work, lower the risk of complications, and achieve permanent removal.

Conclusion: How to do plantar wart removal effectively

Although plantar warts are not fun, treating them and preventing further growth is possible. Good first steps are over-the-counter remedies, but professional treatments such as cryotherapy, laser therapy, and electrosurgery offer the most solutions for Plantar wart removal.

Remember that prevention is as important as Plantar wart removal. Good foot hygiene, wearing protective footwear when riding in public places like buses, and treating warts early can help prevent new plantar warts from developing.

If you have persistent or painful warts, don't delay. Seek professional help. Plantar warts can be removed with the right care, so you can return to living without the discomfort and worry of plantar warts.

Why Does Revitalize London Make The Best Choice For Plantar Wart Removal? 

You will then be able to get our specialized, effective plantar wart removal treatments here at Revitalise London. Our experienced team uses cryotherapy, lasers, and electrosurgery for successful, long-lasting results. We have the expertise and the professional care to help you achieve smooth, wart-free feet.

Read more...

Warts Recurrence After Removal: Causes, Prevention, and Treatment Tips

Warts Recurrence After Removal

Wart recurrence after removal is a common issue. That’s because it’s a problem that comes back repeatedly, leaving many people wondering. Warts are caused by the human papillomavirus (HPV), and they’re generally likely to come back. But why does this happen? It is like this virus itself.

HPV can stay on the skin after it goes away, so wait for the right time to resurface. Incomplete removal, reinfection, or a weakened immune system can all be part of the causes of warts recurrence after removal.

If you’re tired of dealing with stubborn warts that just won’t go away, it’s not your fault only. In this article, we will find out why warts recur and provide you with some practical pointers to help prevent them from happening in the first place. Read this to avoid further outbreaks in the future, and stay one step ahead if you’ve just treated a wart.

Reasons For Warts Recurrence After Removal

It is bad enough to deal with warts, and then warts recurrence after removal makes the experience even worse.  The fact that they keep coming back makes it even more frustrating. Breaking the cycle of Warts recurrence after removal means you have to know why they occur. Let’s explore the common causes:

1. The Persistent Nature of HPV

Human papillomavirus, or HPV, is a complicated virus that can stay in your skin even after removing a wart. Although the wart may seem gone, the virus sometimes hides under the surface, ready to attack again. That persistence is the biggest reason warts return after removal, even if the immune system doesn't completely kill the virus.

2. Incomplete Wart Removal

The roots of warts can penetrate your skin deeply. Unless treatment destroys all the warts, they will recur. In particular, at-home remedies usually don’t penetrate the skin deep enough to eliminate the virus, meaning warts will return when removed.

3. Everyday Contact With Virus

It’s highly contagious and easily spreads through skin contact or infected surfaces. You're risking reinfection if you’re sharing things like towels, razors, or shoes. Another frequent stool in warts recurrence after removal is walking barefoot in public places like gyms or swimming pools.

4. A Weak Immune System

Recurrent warts are usually acute viral infections; your immune system is your best defense against them. If your immune system is compromised or weakened due to stress, illness, or terrible lifestyle habits, you are more likely to have warts recurrence after removal. However, the chances of having warts recur after removal increases when the body is not strong enough to fight off HPV.

Environmental Factors & Habits

Warts love warm and damp areas. Shoes that sweat for a long time and walking barefoot in public places can provide perfect conditions for HPV to spread. Just a few small things, like keeping your feet dry and wearing sandals in shared areas, can greatly reduce the chance of a wart recurrence after removal.

Neglecting Follow-Up Care

Many people think that once a wart is gone, the problem is solved. However, the chances of wart recurrence after removal are higher without proper aftercare. Although warts are usually overlooked, aftercare instructions and follow-up visits ensure the virus is fully removed.

The Cycle of Warts Recurrence After Removal 

Warts Recurrence After Removal

It shouldn’t be like an endless cycle of wart recurrence after removal. Knowing what HPV is and its role in warts, practicing good hygiene, boosting your immune system, and choosing professional treatments reduce your chance of warts returning.

It’s all about preventive measures against wart recurrence after removal. To end the cycle for good, you still need to stay vigilant, follow recommended care, and choose successful treatments.

 Warts that Are More Prone to Recurrence 

Not all warts are the same; some types are more likely to recur after treatment. Knowing which warts are likely to recur can help you achieve your prevention goals and reduce the likelihood of future recurrence.

1. Plantar Warts

If you have plantar warts on the soles of your feet, you should know that they can keep coming back repeatedly. These warts can grow the best in moist conditions, like sweaty shoes, or in gyms and swimming pools. Too often, leftover viral particles in shoes or on surfaces can cause recurrence even after removal. Also, you may even reinfect yourself if you don’t practice proper foot hygiene after the treatment is completed.

2. Flat Warts

They’re small and usually flat in a bunch. They often appear on the face, neck, or hands, making them a highly visible problem. Flat warts also can spread from shaving or scratching, raising the risk of warts recurrence after removal.

3. Genital Warts

Specific types of HPV cause genital warts, and they are highly recurrent. Often, these warts respond poorly to treatment and may need several treatments. But if both partners are not treated on the same visit, the warts can reappear. This is because the area is sensitive, the virus is persistent, and they are particularly hard to eradicate permanently.

4. Periungual Warts

If warts occur around the nails, these are called periungual warts and are prone to recurrent infections since the infected area under the nail bed is hard to remove. If you are bitten or pick at these warts, you can spread the virus, and more growth will appear.

5. Filiform Warts

Also known as long, thread-like warts, these commonly grow on the face around, and more rarely around, the mouth and eyes. They may respond well to treatment, but their location makes them reactive to reinfection by touch or grooming habits.

Why Some Warts Stick Around Longer than Others

Some warts are more likely to recur because of their location, how deep they are in the skin, or how quickly they spread. However, areas with constant friction, shared surfaces, or moisture are especially vulnerable.

Knowing which kinds of warts are most likely to recur gives you more chance to protect yourself from them reappearing.

Preventing Warts Recurrence After Removal 

A painful thing about warts can be that they can come back even after being removed, but you can reduce, or even eliminate, the chances of this happening if you take proactive steps. Here are practical prevention tips to keep your skin wart-free:

1. Boost Your Immune System

A strong immune system is your first line of defense against HPV. Improve your diet by adding fruit, vegetables, and other nutrients, including vitamin C and zinc, which can boost your immune system. Regular exercise, getting enough sleep, and learning to manage stress also improve your body's ability to fight viruses.

2. Practice Proper Hygiene

HPV can spread through direct contact and contaminated surfaces. To prevent warts recurrence after removal:

  • Don’t share towels, razors, or shoes with other people.
  • Regular hand wash, especially after touching affected areas.

HPV thrives in moist environments, so keep your skin clean and dry.

3. Protect Your Skin

When broken or damaged, skin is an entry point for HPV, increasing the chance of reinfection. Wear gloves when performing activities that could cause a cut, and use a moisturizer to prevent skin cracks.

4. Be Careful in Public Spaces

Breeding grounds for HPV infection are public places such as swimming pools, gyms, and locker rooms. To avoid reinfection:

  • Wear sandals or flip-flops in shared showers or around the pool area.
  • When possible, disinfect equipment or surfaces before use.
5. Follow Aftercare Instructions

However, your skin may still be at risk for infection after wart removal. Diligently follow your healthcare provider's aftercare instructions. This may involve leaving him alone so the prescribed ointments can work their way in, removing the warts as best you can, or seeing a follow-up appointment to confirm that they’ve been removed.

6. Avoid Touching Warts

If you have warts, touching or picking at them can spread the virus to other parts of your body or back to the spot you initially treated. Washing your hands thoroughly is necessary if you must touch the treatment area.

7. Consider Vaccination

Some vaccines help prevent some strains of HPV, which lead to warts. While primarily intended to stop genital warts and cervical cancer, it can also lower the risk of other warts associated with HPV.

8. Use Antiviral Products

Over-the-counter products with certain antiviral ingredients can help suppress HPV activity on the skin. They can be used as a preventive measure in areas with a high chance of wart recurrence after removal.

Attempting to remove warts without considering these habits will increase their chances of returning. Consistently taking small steps can make a big difference in staying water-free.

Warts Treatments 

The good part is that some advanced treatments are available to safely remove them and greatly decrease the chances of a recurrence. Let’s explore some of the best options:

Warts Recurrence After Removal
1. Cryotherapy: Freeze the Problem

Warts can be treated with cryotherapy, a popular and effective treatment. The wart is frozen with liquid nitrogen to remove the infected tissue. In most cases, this quick procedure needs multiple sessions to complete removal. It works very well. Wart warts recurrence after removal is possible unless proper care is taken post-treatment.

2. Electrosurgery: Burn It Off

You’re probably familiar with the most effective wart treatment, electrosurgery, which means using electrical currents to burn the wart. This is a great method for large or persistent warts. Electrosurgery performed by a skilled professional decreases recurrence and follow-up care diligently.

3. Laser Therapy: Light Your Way to Clear Skin

Intense light beams called laser therapy are aimed at warts to destroy the infected tissue and lower HPV's activity. It is one of the most advanced options, especially for stubborn warts. It’s more costly than other methods but accurate, and the result lasts, too.

4. Topical Treatments: Gentle but Persistent

Prescription and even over-the-counter topical treatments such as salicylic acid gently work their way on warts by weakening tissue and generating the immune system’s response. These are slower than other options but are convenient and may help prevent warts from recurrence after removal if used regularly.

5. Immunotherapy: Build Your Body’s Defense

There is a chance the immune response might be weakened if warts recur. Immunotherapy strengthens your ability to fight HPV right on your own. Some options include antigen injections or topical immune booster creams, such as imiquimod. This removes existing warts and helps reduce the risk of new ones developing.

6. Surgical Excision: Removing the Root

Surgical excision may be necessary for warts that do not respond to all other treatments. A dermatologist physically removes the wart, removing the virus from the root. However, this method is effective and must be treated carefully afterward to avoid reinfection.

 Alternative Remedies: Be Cautious

Home remedies, such as duct tape or natural solutions like tea tree oil, sometimes don't work for stubborn warts. In most cases, the solution doesn’t address the root cause and may worsen the issue.

Choosing the Right Treatment To Avoid Warts Recurrence After Removal

The treatment depends on the type of wart you have. A dermatologist can customize a plan that reduces your chances of an allergic attack.

If you have stubborn warts, you can say goodbye to them and hello to healthier skin.

 Pre with the right active treatment Warts Recurrence: Practical Tips 

Getting rid of warts doesn’t mean getting rid of recurring warts. Here are the most effective tips to keep warts at bay:

1. Strengthen Your Immune System

Helping to fight is your immune system against the HPV virus that causes the warts. Boost your immunity with:

  • Fruits, vegetables, and lean proteins.
  • Experimentation with regular exercise will enhance overall health.
  • Yoga or meditation techniques of stress management.
  • The ability to sleep enough to allow your body to recover and regenerate.

A stronger immune system means your body is already better equipped to fight off HPV and prevent warts from coming back.

2. Practice Good Hygiene

HPV is a disease that is moist and warm. Clean and dry your skin to lower your chances of reinfection. Follow these hygiene tips:

  • Wash your hands frequently, especially after touching the shared surfaces.
  • Don’t share personal things like towels, razors, or nail clippers.
3. Don’t let the warts come in contact directly.

When you touch warts, the virus can spread to other areas of your body or another person. Wash your hands thoroughly afterward if you must treat an area with warts. Don’t pick at or scratch warts—it will spread the infection.

4. Protect Your Skin
  • HPV finds its way through little cuts, scratches, or damaged skin. Protect your skin by:
  • If you do activities that could cause abrasions, wear gloves.
  • Keep your skin moisturized to avoid drying out and developing cracked skin.
  • You need to avoid sun damage, which makes your skin more vulnerable, so use sunscreen.
5. Be Cautious in Public Space

HPV is commonly found in public places like swimming pools, gyms, and locker rooms. 

6. Vaccinate Against HPV

The HPV vaccine does not prevent warts but prevents certain virus strains from causing them. It is mainly used to prevent genital warts, but it can also protect against other HPV-related warts. If unsure if the vaccine is appropriate, talk to your healthcare provider.

7. Follow up with your Dermatologist.

If the wart is removed, schedule follow-up visits with your dermatologist to ensure the wart and the virus are gone. If there are any signs of recurrence, early detection could mean immediate intervention, stopping the cycle before it resumes.

Long Term Results Require You To Stay Vigilant

Preventing wart recurrence after removal requires vigilance, preventative lifestyle changes, and proactive care. By incorporating these practical tips into your routine, you can achieve smooth, wart-free skin with a reduced risk of a comeback.

Why Choose Revitalize London?

Revitalise London provides advanced skin treatments, including effective treatment for the recurrence of warts after removal. Our expert dermatologists use state-of-the-art technology to offer safe and lasting results. We’re dedicated to providing personalized care plans, a professional environment, and excellent service to help you achieve healthy, wart-free skin.

Read more...

Electrosurgery for Wart Removal: What to Expect  | Choosing The Best Revitalise London 

electrosurgery for wart removal

Have you been tired of dealing with annoying warts that just won't seem to leave you alone? Human papillomavirus (HPV) is the real cause of these irritating skin growths, which can be much more than annoying! They can make you feel uncomfortable and less confident. Some warts can be treated with over-the-counter remedies, but things get more complicated often, and the treatment needs something stronger, like electrosurgery for wart removal.

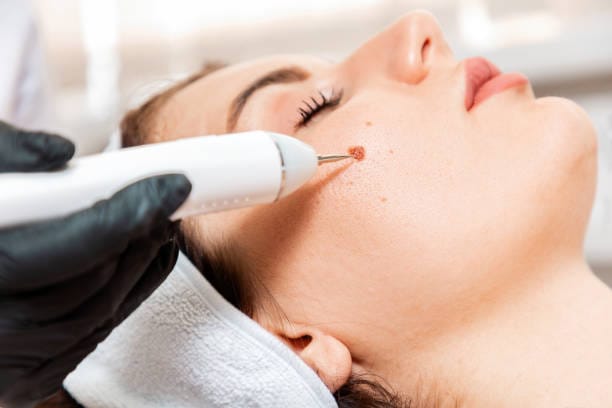
Electrosurgery is the most modern procedure for wart removal, offering fast and accurate elimination. It uses high-frequency electrical currents to remove the wart and protect the surrounding healthy skin. It’s quick, effective, and great for stubborn warts that don’t disappear with other treatment options.

Are you wondering why it’s so effective or how? In this guide, we’ll walk through the entire process step by step, overview the benefits, and offer tips for a fast recovery. Goodbye. Say goodbye to warts and hello to healthier, clearer skin with electrosurgery for wart removal!

Electrosurgery for Wart Removal

Electrosurgery is a highly effective medical treatment that uses high-frequency electrical currents to treat or remove unwanted tissue. This technique works its way on the wart you want to remove and aims to completely remove it without damaging surrounding healthy skin.

Electrosurgery is an advanced process that uses a specialized instrument called an electrode to send controlled electrical energy to the wart. The energy it produces simply generates heat, so the electrode cuts, vaporizes, or destroys the tissue. Unlike other procedures, such as freezing chemical treatments, which may not show instant effects, electrosurgery for wart removal delivers the results immediately.

How is Electrosurgery Effective?

Electrosurgery for wart removal isn’t so popular because it’s precise, versatile, and safe. It works well for various types of warts, including:

  • Common warts: Commonly found on hands and fingers.
  • Plantar warts: Knees: Living on the soles of the feet, they can cause much pain.
  • Large or resistant warts: Treating them is difficult with traditional methods.

Benefits of Electrosurgery

  • Quick Results: It is efficient as the wart is removed in a single session.
  • Precision: The wart tissue is affected only, and the skin around it is preserved.
  • Minimal Recurrence: This targeting the root of the wart decreases the chances for regrowth
  • Versatility: Although otherwise effective, it is perfect for stubborn, deep, or large warts that will not respond to other treatments.

Is It Safe?

Electrosurgery for wart removal is safe and effective if a professionally trained person performs it. Thanks to local anesthesia, the process is virtually painless, and it is performed in a controlled environment to reduce the risks of infection or scarring.

If you are bothered by continuous warts, electrosurgery provides an excellent, fast, and effective alternative to other wart removal methods.

Who Should Go For Electrosurgery For Wart Removal

For people who have persistent issues of recurred warts, electrosurgery for wart removal is the ideal treatment. This process wouldn’t be just as good for everyone. Knowing who might benefit from electrosurgery for wart removal is critical in deciding if it’s right for you.

Consider The Type Of Wart

Electrosurgery is effective for a wide range of warts, including:

Common Warts: These are raised, rough-textured, and usually found on the hands, fingers, or elbows.

Plantar Warts, which appear on the soles of the feet, can be painful, especially when pressure is applied.

Flat warts are smaller and smoother. They often occur on the face, legs, or arms.

Genital Warts: Treatment of genital warts may include electrosurgery, and so would need to be careful and sensitive, if necessary, as they are situated on genital regions.

Electrosurgery Is Ideal For You If:

Electrosurgery is most suitable for individuals who:

  • If you have stubborn or recurring warts, electrosurgery may be best for treating warts that don't respond to standard methods, such as freezing and over-the-counter treatments.
  • Are you looking for a precise, quick treatment? Electrosurgery for wart removal is a good choice because it delivers quick results with minimal downtime.
  • Healthy and without other medical conditions: Good patients for the procedure are people in good health who have no underlying conditions, such as uncontrolled diabetes, that may affect the healing process.
  • Not pregnant: Pregnant individuals should not undergo electrosurgery because the effects of electrical currents on a developing fetus are unknown.

Electrosurgery is an effective treatment for many, but it is always a good idea to speak with a dermatologist to ensure that it is your condition treatment for what you have.

The Procedure Of Electrosurgery For Wart Removal

If you're considering electrosurgery for wart removal, you will want a decent idea about the process and how it affects you. Getting ready and knowing exactly what will happen during the procedure. Here’s a step-by-step guide to what you can expect from start to finish:

electrosurgery for wart removal
  • Before the Procedure

Consultation is the first step when you arrive at your dermatologist's office. Your dermatologist will examine the wart and discuss your medical history. The treatment area will then be cleansed with local anesthesia. The anesthetic numbs the area around the wart during the procedure so you won’t feel major pain.

  • During the Procedure

Your dermatologist numbs the area and then applies high-frequency electrical currents to the wart with a fine electrode. The electrical energy causes the heat to vaporize the wart tissue. The local anesthetic helps numb the area so you don’t feel discomfort. You can’t feel anything more than a slight warmth or tingling sensation.

The procedure usually lasts 15 to 30 minutes, depending on the size and location of the wart. It may take longer if you are treating more than one wart.

  • Post-Treatment

Once removed, the wart will be cauterized to seal the wound and prevent bleeding. Afterward, your dermatologist will protect the site with a bandage. After the procedure, you may feel mild discomfort, redness, or swelling, but these side effects soon disappear.

People return to work the day after treatment or within 24 to 48 hours. However, following the aftercare supervision suggested by your dermatologist to support healing and avoid complications is important.

Electrosurgery for wart removal is a quick and efficient procedure with excellent results, minimal downtime, and recovery.

Perks of Electrosurgery For Wart Removal 

Electrosurgery for wart removal is one of the most effective methods of wart treatment, as electrosurgery benefits in various ways. If you're considering this procedure, here are some key benefits that may help you make an informed decision:

1. Precision and Accuracy

One of the most interesting benefits of seeing your dermatologist is that the high-frequency electrical current is delivered directly to the wart rather than treating nearby tissue that could cause additional burns and scar formation. This minimizes the risk of damage to surrounding healthy skin while keeping it clean and in control.

2. Quick and Effective

If you’re looking for a faster method, Electrosurgery for wart removal is all you’ll need. The procedure usually takes between 15 and 30 minutes and lasts longer for larger warts. Unlike other treatments that may require several visits, electrosurgery offers a one-visit treatment for the wart, resulting in immediate results. This is a great choice for people with busy schedules or those who want a quick fix.

3. Minimal Downtime

After electrosurgery for wart removal, most patients will go home with little to no downtime. Side effects, such as mild swelling, redness, or discomfort at the treated site, usually disappear within a few days. It’s an easy recovery time; most people will return to normal activities within 24 to 48 hours.

4. Long-lasting Results

Electrosurgery for wart removal is excellent and can cut down on recurrence. The wart is cauterized during the procedure by targeting it at the root, so there's a low chance of the warts returning. For this reason, electrosurgery is a reliable, long-term method of removing warts.

5. You can Use It for A Variety of Warts

Electrosurgery can treat all types of warts — common, plantar, deep, or large. It’s a versatile treatment, working on warts in various spots that are hard to reach.

Electrosurgery combines speed, effectiveness, and convenience, so it is an ideal electrosurgical device for the treatment.

 Aftercare and Recovery

Aftercare is critical to a successful recovery and reduced risk for complications after electrosurgery for wart removal. The procedure itself is a quick and straightforward process. However, how you care for the treated area afterward is important in healing. Here’s what to expect and how to take care of your skin:

1. Keep the Area Clean and Dry

Your dermatologist will apply a sterile dressing (bandage) to the treatment site immediately after the procedure. The area must be kept clean and dry to prevent infection. To keep the wound covered and protected, a dressing change may be recommended daily or as directed by your dermatologist.

2. Don’t Scratch or Pick at the Area

Refrain from scratching or picking at the area you've treated. Although it may be tempting, don't. Doing so can slow down the healing process, increase the chance of infection, and leave a scar. As your skin heals, a crust may form over the wart site. This is normal. Do not pick this skin area, as it may lead to complications. 

3. Apply Topical Treatments

Your dermatologist may suggest using a mild antiseptic or ointment to help the body heal itself faster and to help reduce the chance of infection. Follow directions on topical products and use them for skin healing.

4. Limit Sun Exposure

After electrosurgery for wart removal, avoiding excessive sun exposure for the first few weeks is important. Healing in the sunburned skin can take longer, and scarring becomes more likely. If you have to be out in the open, apply a broad-spectrum sunscreen on the area with SPF 30 or higher to protect your skin.

5. Follow-Up Appointments

If you need more time for the skin to heal, you could need a follow-up visit with your dermatologist to double-check your progress. At this appointment, they'll check the area of the treated wart that's healing, and if the scabs don’t heal well, they will make sure everything's healing just fine.

Following these aftercare instructions can ensure a fast and comfortable recovery with as few subsequent complications or discomfort as possible. Patients usually heal completely in less than a few weeks.

 Conclusion: Should You Do Electrosurgery for wart removal 

Electrosurgery for wart removal is a quick, effective, and accurate approach to patients not treated with over-the-counter treatments. For many individuals who want something to clear up warts quickly, electrosurgery offers just the kind of treatment they’re looking for, with nearly no downtime and lasting results on small and large types of warts.

The procedure is generally safe, but discussing the risks is important. You must also follow proper aftercare instructions for optimal healing. Working closely with a dermatologist, especially for electrosurgery, is a must since it will help determine whether electrosurgery is the appropriate treatment for your particular case and answer any questions regarding the procedure.

If you are nervous about the idea of facing those painful warts and want clean skin back again, electrosurgery is what you’re missing out on. It's quick, precise, nearly painless, and delivers excellent results – a great option for a reliable treatment.

At Revitalise London, our dedicated professionals are equipped to perform the most effective treatments, such as electrosurgery, to deliver smooth, wart-free skin. We can help you restore your skin’s normal beauty, and it’s easy to book a consultation to learn more today.

Why is Revitalise London the best place for Electrosurgery for Wart Removal? 

Here at Revitalise London, we know how upsetting it is when stubborn warts won’t heal or come back. Therefore, we offer effective, safe, and professional solutions such as electrosurgery for wart removal. Here’s what sets us apart and why you should trust us for your skin care needs:

electrosurgery for wart removal

1. Expertise You Can Trust

With years of experience, our team of highly trained dermatologists and skin care specialists are experts in electrosurgery. We maintain high standards of care and pride ourselves on staying updated with the latest skincare and medical treatment advancements. Our experts can treat all types of warts, from simple warts to more advanced cases, and they guarantee precision treatment and the best results.

2. State-of-the-Art Facilities

Advanced medical equipment means safe and effective treatments for Revitalise London. Our facilities prioritize patient comfort, featuring a clean, comfortable environment ready to put you at ease while in the building. We prioritize your safety and satisfaction from your consultation to the final follow-up.

3. Personalized Treatment Plans

At Revitalise London, we believe every patient is unique, so we create treatment plans to serve your patients' unique needs better. As part of your initial consultation, our specialists will first assess the wart, type, and location of these warts and their overall skin health. We’ll make a customized treatment plan based on this evaluation to maximize results.

4. Aftercare Comprehensive.

At Revitalise London, we provide detailed aftercare instructions to help you recover quickly and minimize the risk of complications. During your recovery period, we're always here to answer questions or address any concerns from our team. We also schedule follow-up visits to ensure you heal and are satisfied with the results.

5. Low Downtime and Convenience

We know that you value your time, so we will do our best to make the whole process as simple as possible. Most procedures at Revitalise London take 30 minutes or less and are quick and efficient. After treatment, you can return to your normal routine in minutes without downtime.

6. Focus on Comfort and Care

Medical procedures can be scary for some, but we put your comfort first at Revitalise London. We strive to make the entire treatment journey stress and pain-free for you by applying local anesthetics to ensure a pain-free experience or a calm and supportive atmosphere.

7. Happy Clients Proven Results

You can read our track record for yourself. Many clients we’ve helped have seen clear and wart-free skin with our advanced electrosurgery treatments. And their glowing reviews and testimonials demonstrate that they depend on and are satisfied with our services.Revitalise London offers a professional, patient-focused experience that yields the best results. Book your consultation today for our expert electrosurgery for wart removal services, and become proactive in the battle against your warts.

Read more...

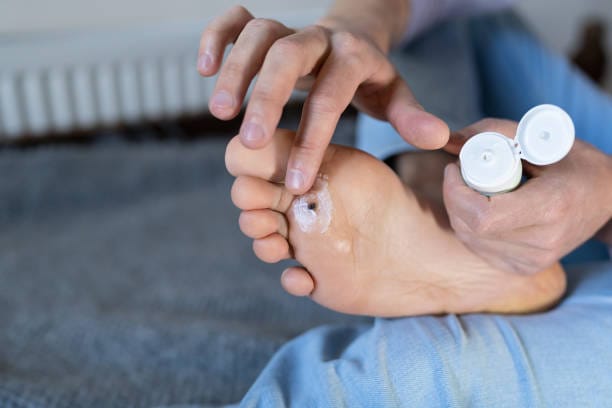
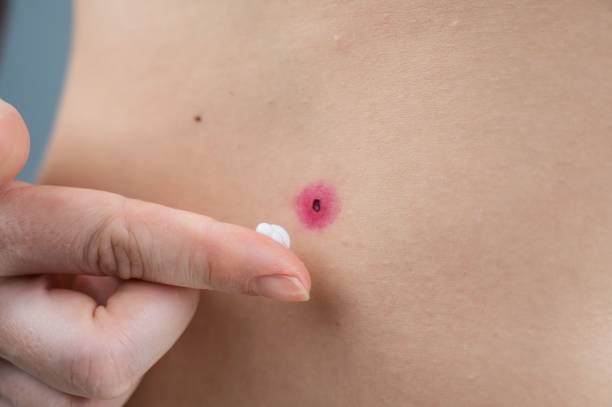
Wart Removal for Sensitive Skin: Best Options and Safety Tips

wart removal for sensitive skin

When your skin is sensitive, dealing with warts is frustrating. However, warts — caused by the human papillomavirus or HPV — can appear anywhere on the body, and not every wart is easy to remove. Depending on sensitive skin, finding the proper method to remove warts is essential to avoid irritation and damaging the skin further.

Treatments for sensitive skin need special care and attention, and it’s essential to understand what treatments will not damage sensitive skin just as much as they help. In this article, you’ll learn the best wart removal choices for delicate skin and tips to protect from complications while being treated. Whether you’re on the hunt for home remedies or professional treatments, you’ll find skin solutions that work for your skin type. Let’s dive in!

 Sensitive Skin and Warts

When your skin is sensitive, it is easier to irritate, red, and inflamed when you come in contact with specific products or treatments. If you have sensitive skin, it’s crucial to make sure that the wart removal method you use won’t make your skin react unpleasantly. Harsh chemicals, rough textures, or intense treatments can all be too much for sensitive skin, meaning it’s more likely to have adverse side effects.

Small growths caused by the human papillomavirus (HPV) are known as warts. For the most part, they are harmless, but they can be unattractive and occasionally painful. Some people may have more discomfort during the removal process or even suffer from longer-term irritation following treatment.

The first step is to understand your skin type and the nature of the warts in question you want to treat. Warts may be small to large, located almost anywhere on the body, and cause varying degrees of discomfort. 

But how do you remove a wart safely without causing sensitive skin to become irritated? So, let’s see what the best option is next!

Best Method for Wart removal for sensitive skin.

When it comes to Wart removal for sensitive skin, it has to be done very carefully to avoid irritating or damaging the surrounding skin. To your relief, there are treatments of all kinds that can be gentle and also effective. We’re going to take you through the best wart removal methods specifically for people with sensitive skin, as shown below.

Over-the-Counter Treatments

The first thing people start with is over-the-head wart removal treatments since they are easy and convenient. The active ingredients in these products are generally salicylic acid or a cryotherapy spray that is meant to remove warts at a slower rate.

  • Salicylic Acid

How It Works: Softening and eventually breaking down the wart tissue through time is what salicylic acid does. The active ingredient hits the keratin inside the wart and dissolves it, allowing the wart to fall off itself.

Why It’s Ideal for Sensitive Skin: Salicylic acid is easily accessible in concentrations suitable for sensitive skin. Types are gels, creams, and pads to give more control. But it's essential to use a lower concentration when you begin.

How to Use: Put a small amount onto the wart and cover the surrounding skin with petroleum jelly to reduce the possibility of irritation. For several weeks, you’ll need to repeat the process until the wart disappears.

Pro Tip: Patch test the product before applying it to the wart. Now, your skin won’t rebel and have a negative response.

  • Cryotherapy Sprays

How It Works: The sprays work by freezing the wart, using a mixture of dimethyl ether and propane that kills and shrivels the tissue, and it falls off.

Why It’s Ideal for Sensitive Skin: Professional cryotherapy treatments use liquid nitrogen; cryotherapy sprays are much gentler. The formulation of these at-home sprays also has minimal irritation to the adjacent skin.

How to Use: Use the spray to apply to the wart directly as directed. The wart should freeze and fall off after a number of applications, though these can take anything from a few days to a couple of weeks.

Pro Tip: Do not spray the solution on non-wart areas of the skin. Then, apply your product to the location where you want it to go, using a cotton swab to limit the area.

Treatment by freezing – also known as cryotherapy.

Cryotherapy is one of the most common types of treatments for wart removal, including for very sensitive people. Freezing of the wart with liquid nitrogen destroys the tissue so that it breaks down and falls off in a few days.

What It Involves:

A healthcare professional does this with liquid nitrogen to freeze the wart. The procedure is rapid and works by damaging enough of the wart’s cells that it disappears. A blister forms around the wart after it has been frozen, and the wart comes off within a few days.

Why It’s Ideal for Sensitive Skin:

While cryotherapy involves freezing the wart, if performed correctly, this safe and effective option is acceptable for people with sensitive skin. The trick is to apply the freezing agent just right so it hits only the wart tissue, not the surrounding skin.

How to Use:

For those of you with sensitive skin, cryotherapy for wart removal should never be attempted at home and ideally shouldn't be done even by a trained professional. Exposure to liquid nitrogen can be irritating or even frostbite. The size and location of the wart may determine if it’s treatable in one session or may require multiple sessions.

Pro Tip: Side effects of cryotherapy include mild discomfort and redness after the procedure, but each should be short-term. Soothe the skin post-treatment with aloe vera gel.

Laser Wart Removal

Laser wart removal is an advanced method of treating warts by using a focused beam of light that damages the wart tissue. Being minimally invasive and precise, it’s an excellent option for people with sensitive skin.

What It Involves:

 If the treatment is done with a laser, a trained dermatologist uses the laser to highlight the wart, which consequently kills the wart’s blood vessels and causes the tissue to die. It's a very controlled process, and the doctor is able to avoid damaging the surrounding skin.

Why It’s Ideal for Sensitive Skin:

This laser removal procedure is a non-invasive one that usually has minimal to no irritation to the skin. Because the focused light energy is only applied to wart tissue, oversensitivity to surrounding sensitive areas is minimized. This treatment is perfect for deep and treatment-resistant warts.

How to Use:

Laser wart removal is done in a dermatology clinic or even in a unique medical setting. The procedure is quick, usually taking 15 – 30 minutes, depending on how many and how large the warts are. During the procedure, some mild discomfort occurs, but most patients find it tolerable.

Pro Tip: If warts are more extensive or more stubborn, several treatments may be necessary. Your dermatologist may tell you to use a mild moisturizer or ointment after the procedure to keep the skin moist and to relieve any inflammation.

Natural Wart Removal Remedies

Those with sensitive skin and those preferring a more natural approach can use several home remedies for wart removal. Gentler on the skin, but they may need to work more quickly, are these methods.

wart removal for sensitive skin
  • Apple Cider Vinegar

How It Works: You know that apple cider vinegar is acidic, so it should help break down the wart tissue. Acid from the vinegar may dry out the wart and make it come off.

Why It’s Ideal for Sensitive Skin: A natural remedy, the apple cider vinegar is often not as harsh a chemical. Yet it’s best not to use the vinegar straight away as it can irritate.

How to Use: Dilute apple cider vinegar on a cotton ball and put it on the wart. You apply a bandage covering it overnight for a couple of days, continuing the process until the wart is gone.

Pro Tip: Don’t use vinegar straight on the skin because it can lead to irritation; always dilute the vinegar with water (1:1 ratio).

  • Aloe Vera

How It Works: It is well known that Aloe Vera possesses properties that cool off and heal inflammation, which is why it’s the ideal cream for sensitive skin. Not only may it reduce irritation and help promote healing, but it also helps reduce the wart.

Why It’s Ideal for Sensitive Skin: It’s gentle and should keep the skin calm, therefore making aloe vera an ideal choice for delicate areas.

How to Use: After that, apply fresh aloe vera gel to the wart and leave it on for 15-30 minutes before you rinse it off. It should be repeated twice a day for the best results.

Pro Tip: Be sure to use a pure aloe vera gel that’s entirely additive and fragrance-free.

  • Tea Tree Oil

How It Works: The very antibacterial and antiviral properties of tea tree oil will get to work against the exact virus causing the wart. It also has a drying effect that could help clear the wart out a little at a time.

Why It’s Ideal for Sensitive Skin: Ingestion of tea tree oil is potent, but it's gentle when diluted correctly, which may make it a good choice for sensitive skin for that reason.

How to Use: If you have tea tree oil, mix it with a carrier oil and rub it onto the wart. Wash it off, but leave it on for several hours or overnight.

Pro Tip: Make sure to patch-test tea tree oil before you use it on larger areas. To see if your skin will react.

Best Wart removal for sensitive skin —Safety Tips

For those with sensitive skin, safety is a priority when removing warts. If you’re not careful, even the most gentle treatments can irritate. Below are practical safety tips to help you have successful wart removals and, at the same time, keep your skin protected.

wart removal for sensitive skin

Product patch test first.

Such skin is vulnerable to reactions -- so always patch-test any treatment or remedy you apply.

How to Patch-Test: Lightly apply a small amount of the product to some healthy skin (such as the inside of the forearm). Redness, itching, or irritation can occur one day or more after nanochemistry treatment; check after waiting 24–48 hours.

Why It’s Important: The use of patch testing can prevent established reactions to applying treatments directly onto the wart.

Protect the Surrounding Skin

For those with sensitive skin, the area around a wart is in itself as important as the wart itself.

How to Protect: During treatment, shielding the skin around the wart with petroleum jelly or a barrier cream is a good idea. It reduces the chance of exposure to harsh ingredients by accident.

Pro Tip: If using adhesive patches, be sure they stick only to the wart and not to sensitive skin.

Follow Instructions Carefully

For both over-the-counter treatments and professional services, whichever way you use them, make sure you do it exactly according to the given directions.

For OTC Products: Take just the dosage and frequency as advised. Using treatments too much can cause skin to become damaged or irritated.

For Professional Treatments: Make sure you know what post-treatment care is, keeping the treated area clean and hydrated.

Don’t Scratch or Pick at Warts

While we might find scratching at warts tempting, it can actually make things worse.

  • Why Avoid It: You can pick at warts, but this spreads the virus to other parts of your body or causes an infection. On sensitive skin, however, this can be more irritating and cause scars to form.
  • What to Do Instead: Bandage or patch the wart to keep from accidentally rubbing the wart.

If in Doubt – Choose professional treatments.

When OTC products or home remedies don’t work, the safest thing to do is to consult a dermatologist.

  • Why It’s Better: Treatments can be tailored by professionals according to your skin type, so they know that treatment will remove the wart without affecting delicate areas.
  • What to Ask: Bring your concerns, as well as options such as cryotherapy or laser removal, to discuss.

Be Patient and Consistent

For people with sensitive skin, wart removal can take a while. Rushing the process or switching treatments too much can be worse than good for your vitamin D levels.

  • Stick to a Plan: Change one method at a time over a few weeks before deciding if they have a good or bad effect.
  • Gentle Persistence: Treatments for sensitive skin have to be slower and gentler to avoid issues.

After Treatment: Hydration and Moisturization

When you remove your warts, it’s essential to keep your skin moisturized so that it can recover properly and to help prevent your skin from becoming dry.

  • Use Gentle Products: Go with unscented and hypoallergenic moisturizers suitable for sensitive skin.

Pro Tip: After treatment, apply a soothing cream that contains aloe vera, or chamomile extract to alleviate redness or irritation.

Schedules for Post-Treatment Care for Sensitive Skin

Whatever is causing your warts to look like they do, you’re going to need to take appropriate measures to make sure they don’t come back in the forms that make you uncomfortable and embarrassed at the end of the day. Treatment care is needed in the days following to minimize irritation and reduce the risk of scarring and recurrence. Now, let’s look at some ways you can help smooth your recovery.

1. Keep the Area Clean and Dry

Hygiene is the first thing to heal.

Why It’s Important: If the wart is removed with surgical or chemical agents, cleanliness prevents infections.

How to Do It: Gentle, lukewarm water and a mild fragrance-free cleanser can be used to wash the area. Dry it with a clean towel pat.

2. Avoid Sun Exposure

Sensitive 'healing' skin may be irritated by direct sunlight.

Why It’s Important: The darkening of scars or redness in treated areas can be caused by UV rays.

Protective Measures: If you can, put loose clothing over the affected area or use a broad-spectrum sunscreen with SPF 30 or higher.

3. Soothing Ointments or Creams can be used.

After wart removal, it is recommended that you care for sensitive skin extra carefully.

Recommended Products: Calendula cream, healing ointments recommended by a dermatologist, or aloe vera gel.

Application Tip: Rub gently until the treated skin isn’t irritated.

4. Avoid Harsh Skincare Products

For the healing phase, avoid products that contain alcohol, acids, or strong fragrances.

Why It’s Important: But these can cause irritation and slow down the recovery.

What to Use Instead: Choose hypoallergenic, non-comedogenic, gentle on sensitive skin products.

5. Monitor Signs of Infection.

It is essential to look for any unusual symptoms.

Signs to Look For: Sometimes, it might get red and swollen, fill with pus, and become more painful.

What to Do: If these symptoms occur, see your dermatologist immediately.

6. Maintain Regular Follow-Ups

If your skin’s too sensitive, periodic check-ins with a dermatologist ensure the treatment is effective and healing is on track.

What to Ask: Talk about what they are doing to help skin heal and prevent future warts.

Choosing Wart Removal on Sensitive Skin with Revitalize London

At Revitalize London we provide gentle, effective treatments for sensitive skin. Our expert dermatologists understand the problems of getting rid of warts without irritating sensitive skin, and every procedure is designed to focus on your comfort and safety.

Sensitive Skin Tailored Treatment

From a safe topical solution to cryotherapy, advanced wart removal options, and laser therapy, we are able to provide the most advanced wart removal options. We take the time to make sure that your skin's specific needs are going to be met by our meticulous assessment and designing your personalized treatment plan for results.

Smart Technology

We use the most recent tools and techniques to perform precise, minimal invasive wart removal procedures. These are methods to minimize the possible discoloration, irritation, or scarring.

We are happy to contact you today to schedule your consultation and wart removal, especially for your sensitive skin!
Read more...

How to Prevent Nail Fungus After Treatment: Tips for Long-Term Results

Prevent Nail Fungus After Treatment

Getting rid of nail fungus is only the first step to healthier nails, but it doesn’t stop there — maintaining your nails fungus-free for the long term takes extra work. But many people don’t understand how easily fungal infections come back if they’re not taken when precautions aren’t. No matter how, it’s good to know how to prevent nail fungus after treatment.

Fungal spores love damp, warm environments such as sweaty shoes or a locker room and quickly return unless we have formed good habits. The good news? It’s easy to protect your nails with a few simple steps!

In this article, we take you through the easy-to-do, practical tips so that your nails stay strong, clean, and fungus-free. You’ll learn how to maintain your results — and how not to get reinfected. It’s time to begin to keep your nails healthy for the long haul…

Why Do You Need To Prevent Nail Fungus After Treatment

Successful treatment for nail fungus doesn't guarantee a return to normal. It’s first essential to understand the reasons for recurrence. Nail fungus likes certain conditions, and if they aren’t addressed, there’s a high risk of being reinfected.

How Fungal Spores Survive

Fungal spores are tough. They have a habit of hanging out in your shoes, your socks, and even in nail tools, waiting for the right conditions for them to grow again. Spores can spread quickly in your environment if they are warm, moist, or poorly ventilated, and they can soon reinfect your nails.

Recurrence: Common Mistakes That Lead To Recurrence

  • Poor Hygiene: Fungus needs to regrow, which might only be prevented if the feet and nails are regularly cleaned.
  • Not Treating Underlying Conditions: Fungus can thrive in the environment provided by any issues such as excessive sweating or Diabetes.
  • Skipping Preventive Steps: Some people don’t follow preventive measures such as applying antifungal sprays or powders after treatment.

Addressing the Root Causes

Breaking the cycle means attacking those conditions that allow the fungus to survive. This means keeping your feet clean and hygienic, treating any sweat issues that arise, and sanitizing any things involving your feet.

When you tackle those things, they’re not just fighting fungus. They are preventing that fungus from ever coming back.

Hygiene To Prevent Nail Fungus After Treatment

After treatment for nail fungus, it is essential to keep up good hygiene. Keeping your nails healthy and fungus-free in the long term is simple — and simple means consistent habits.

1. Keep Nails Clean and Trimmed

  • Trim Regularly: They are less likely to trap dirt and moisture, so they are less likely to infect with a fungus. Do your nails? Use a sharp and sanitized nail clip for a clean cut.
  • Clean Under Nails: If you use a soft brush to clean beneath your nails gently, removing any debris that can harbor fungal spores is also helpful.

2. Wash and Dry Feet Thoroughly

  • Daily Washing: wash your feet with soap and warm water, especially if you exercised or wore closed-toe shoes.
  • Dry Completely: Fungus love to breed in moisture between your toes. Whether you dry with a towel or not, make sure you do it well, especially in these areas.

3. Use Antifungal Products

  • Sprays and Powders: To get rid of lingering spores, use either sprays or powders on your feet and your shoes.
  • Moisturizing Wisely: Keeping your feet hydrated is essential, but use lightweight, nongreasy creams that don’t leave excess moisture.

4. Avoid Sharing Personal Items

  • Nail Tools: Use your clippers, files, or any other tools; disinfect each of them after every use.
  • Towels and Socks: Don't share these items because fungal spores can quickly transfer.

5. Shoe and sock disinfect

  • Sanitize Shoes: Away from debris, you need to use antifungal sprays or UV sanitizers to kill spores inside your shoes. Other shoes that they can put in so they can air out completely.
  • Proper Sock Care: To kill any remaining fungus, wash socks in hot water with a detergent that’s also a disinfectant. You need breathable, moisture-retaining choices like cotton or bamboo.

6. Monitor Your Environment

  • Public Spaces: Be careful at places like pools, gyms, and locker rooms. Protect your feet by wearing waterproof sandals.
  • Home Cleaning: Clean floors, mats, and rugs where you’ll be walking barefoot regularly.

By sticking to these hygiene practices, you can create an environment that won’t allow fungus to thrive, and you can get the best treatment results. Be consistent, and in time or willpower, your neurology will get to healthy, beautiful nails.

Tips after treatment To Prevent Nail Fungus After Treatment

What you wear also matters a great deal in protecting your nails from getting fungal infections. Warm, dark, and moist environments are just the place where fungus loves to live—right inside your shoes. There are a few things you can do to reduce the risk of nail fungus returning after getting rid of it:

Prevent Nail Fungus After Treatment

1. Choose Breathable Shoes

Go for Breathable Materials: Natural materials in shoes like leather or canvas offer better airflow and don’t let moisture buildup accumulate.

Avoid Tight Shoes: Shoes that pinch or don’t let your feet move can trap sweat and moisture, which is a perfect place to develop fungus.

2. Change Shoes Regularly

Rotate Shoes: Rotate between two or more pairs of shoes to allow your shoes to air out. That keeps moisture out of your shoes and helps them dry entirely between wears.

Avoid Wearing the Same Pair Daily: Moisture and fungal spores build up over time when you wear the same shoes every day.

3. Use Antifungal Insoles

Insert Antifungal Insoles: Your shoes will stay dry, and it reduces the danger of fungal growth. These specialized insoles are super helpful.

Replace Regularly: Insoles need replacing every few months to continue to be effective.

4. Disinfect Shoes and Socks

Clean Shoes Regularly: Kill any remaining spores by spraying antifungal disinfectants inside your shoes.

Wash Socks Thoroughly: If your socks are prone to fungus, wash them in hot water and with a good antifungal detergent to get rid of any fungus.

 Prevent nail fungus after treatment: Diet and Lifestyle Changes

Nail fungus kills when your body is healthy. Changes to your diet and lifestyle can support your immune system so that you don’t have to be reinfected with the disease after treatment.

1. Nutrition to Boost Your Immune System

  • Eat Vitamin-Rich Foods: They contain vitamins A, C, D, and E to help keep healthy skin and nails. Eat citrus fruits, leafy greens, and nuts in your diet.
  • Strengthen with Protein: Keratin is the protein that makes up nails. Strong nail growth can be promoted with lean meats, eggs, and legumes.

2. Stay Hydrated

Keeping you hydrated, in general, helps keep your skin and nails healthy, so you have a natural defense against infections. Have 8-10 glasses of water per day.

3. Maintain a Healthy Weight

Nail fungus can result from conditions like poor circulation or diabetes, which result from being overweight. Keep to a regular diet and routine levels of exercise to help with your weight.

Preventing Recurrence of Fungus With Regular Nail Care

To prevent nail fungus from returning after treatment, it’s essential to have consistent nail care. To keep your nails healthy and create a barrier against future infections, you need to have a proper routine.

Prevent Nail Fungus After Treatment

1. Trim Nails Properly

Use the Right Tools: Never use dirty, dull nail clippers. Don’t share tools with others.

Cut Straight Across: Nails trimmed straight across reduce the chance of getting ingrown nails, which can be entry points for fungi.

File Rough Edges: Take a nail file to smooth out rough edges they might otherwise catch, trap dirt in, etc.

2. Avoid Nail Injuries

Wear Protective Shoes: Protective shoes can protect your nails from things that go flying or take heavy pieces with them.

Be Gentle: Don't get overly aggressive manicures or pedicures that can harm the nail bed and open it up to infection.

3. Moisturize, but not Overdo It

Focus on Balance: A dry nail is inclined to crack, and excess moisture may feed the fungus that grows on the nails. A lightweight, non-greasy moisturizer for nails.

Apply Daily: Moisturize every day to keep nails healthy and strong.

4. Avoid Nail Enhancements

Skip Artificial Nails: Fake nails and acrylics can trap moisture that then causes a home for fungus.

Limit Nail Polish: Take breaks from polish, especially if you’ve just overcome some kind of infection, to let your nails breathe.

5. Disinfect Tools and Surfaces

Clean Nail Care Tools: Avoid touching your mouth or hands afterward, and store clippers, files, and tools in a clean place where they can only be used after disinfecting with alcohol or boiling water after each use.

Keep Nail Stations Clean: Sanitize the surfaces and tools used for nail care wherever you do it — at home or even at a salon.

6. Inspect Nails Regularly

Check for Early Signs: You’ll also be watching for discoloration, thickening, or a change in texture that may indicate the fungus is becoming persistent.

Seek Professional Help If Needed: If your recurrence is detected first, consult a professional.

If you take proper nail care seriously, you can ensure there are no blurs in the results of your treatment and get long-lasting, healthy nails. The best thing you can do to prevent fingernail fungus from receding is to remain consistent with your treatment.

 Environmental and Habitual Additions to Avoid Nail Fungus

You can lower your risk of getting nail fungus to return after treatment by creating a fungus-free environment and following good habits. Making small changes in your surroundings and behavior will help protect your nails.

1. Keep Your Home Clean

Sanitize Common Areas: Clean floors, carpets, and rugs regularly, especially on the floors you walk barefoot.

Disinfect Bathrooms: If you are prone to athlete’s foot, pay extra attention to bathroom floors and mats and use antifungal sprays or bleach-based cleaners.

Ventilate Shoes Properly: Don’t store shoes in closed, humid areas that encourage fungal growth.

2. Barefoot Walking in Public Isn’t Something You Should Be Doing.

Wear Protective Footwear: When you're in gyms, pools, or anywhere else using communal areas such as public showers, wear flip-flops or waterproof sandals, as they'll help lower your chances of exposure to fungal disease.

Keep Feet Covered at Home: Also, use slippers or clean socks to avoid direct contact with floors if you’ve had a previous infection.

3. Practice Good Laundry Habits

Wash Towels and Linens Frequently: Clean your towels, socks, and bedsheets using hot water to kill fungal spores.

Separate Laundry: Separate laundry items that you touch your feet with, such as socks and shoes, to stop the fungus from spreading.

4. Disinfect Shoes and Socks

Use Antifungal Sprays: Antifungal sprays can also be used to kill fungi in your shoes after each use.

5. Invest in Antifungal Products

Use Treated Mats: Put antifungal-treated mats in high-risk spots like bathrooms.

Antifungal Powders: Drench these in shoes or on your feet before socks and wear them to offer more protection.

Ensuring your nails stay fungus-free in the long term is to keep your environment clean, together with building healthy habits. There is no end to the prevention, but these steps can minimize your chances of recurrence dramatically.

Why Follow-Up Appointments are Important To Prevent Nail Fungus After Treatment

After successful treatment, nail fungus can come back unless there are help appointments for follow-up. After all, your performance can be professional, and someone can monitor your progress, provide additional tips, and handle any remaining problems.

  • Monitor Nail Health: Sometimes, the nail fungus can hide below the surface or come back without looking like it first did. It’s all gone, but only with regular checkups.
  • Prevent Recurrence: This can help a potential patient identify potential risks or habits that may expose them to reinfection and advise how to prevent this.
  • Address Side Effects: Follow-ups are also necessary if you are taking oral medications for nail fungus, as side effects from these medications can be managed and overall health monitored.

When Should You Schedule Appointments?

  • Initially After Treatment: When you’ve finished your treatment, schedule a visit 4—6 weeks later to make sure the infection has cleared.
  • Ongoing Monitoring: It’s also essential to follow the advice of your doctor and go for a check-up 3–6 months after the time if you are likely to develop fungal infections.
  • Visual Examination: If you have a history of recurrence, your doctor will look for changes in the appearance of your nails, such as discoloration or thickening.
  • Lab Tests If Necessary: A small nail sample may be tested for fungal spores if there is some doubt that the infection will fully resolve.
  • Preventive Recommendations: If your nails become lost and the beds don’t heal, then your doctor may prescribe more potent antifungals and perhaps suggest stronger over-the-counter products or even drops, as well as prescribe prescription strength antifungal creams to keep your nails healthy

For people with conditions such as diabetes or poor immunity, regular podiatrist visits are essential. Having these specialists is to prevent complications from occurring or have healthy feet and nails.

The Combination of Professional Guidance with Self-Care

Consistent at-home preventive measures paired with follow-up appointments work best. Let your doctor know what you do for nail care and receive specific advice to improve it further.

Proactive follow-ups make sure your treatment sticks and prevents minor issues from becoming big problems. Regular monitoring is also a great thing to do to keep your nails healthy and free of fungus.

Why to Choose Revitalize London To Prevent Nail Fungus After Treatment 

Revitalize London offers our advanced and personalized nail fungus treatment solutions. Our professional team of doctors has some modern methods of treating this disease, such as oral medications, laser treatments, and topical therapies, which yield efficient and effective results.

For people with persistent infections or those with underlying conditions such as diabetes, we know the importance of maintaining healthy nails. To help you achieve long-term nail health and avoid reinfection, we give you tailored aftercare advice.

Once in the Revitalize London care, your care doesn’t end at the treatment. Taking a sensible approach can go a long way. We give detailed post-procedure guidance and recommend soothing skincare products so that your sensitive skin can heal as quickly and as comfortably as possible.

An established favorite for professional skincare, Revitalize London has years of experience treating all skin types. We would like to help you have clearer, healthier skin in our welcoming, professional environment.

For safe and compassionate care, trust Revitalize London. This is the beginning of your journey to healthy, fungus-free nails!

Wart removal for sensitive skin

Wart Removal for Sensitive Skin: Best Options and Safety Tips

Meta-description: Learn about what warts are, the best methods for wart removal for sensitive skin, the aspects to consider before and after the treatment if you have sensitive skin, and some other helpful information. 

When your skin is sensitive, dealing with warts is frustrating. However, warts — caused by the human papillomavirus or HPV — can appear anywhere on the body, and not every wart is easy to remove. Depending on sensitive skin, finding the proper method to remove warts is essential to avoid irritation and damaging the skin further.

Treatments for sensitive skin need special care and attention, and it’s essential to understand what treatments will not damage sensitive skin just as much as they help. In this article, you’ll learn the best wart removal choices for delicate skin and tips to protect from complications while being treated. Whether you’re on the hunt for home remedies or professional treatments, you’ll find skin solutions that work for your skin type. Let’s dive in!

 Sensitive Skin and Warts

When your skin is sensitive, it is easier to irritate, red, and inflamed when you come in contact with specific products or treatments. If you have sensitive skin, it’s crucial to make sure that the wart removal method you use won’t make your skin react unpleasantly. Harsh chemicals, rough textures, or intense treatments can all be too much for sensitive skin, meaning it’s more likely to have adverse side effects.

Small growths caused by the human papillomavirus (HPV) are known as warts. For the most part, they are harmless, but they can be unattractive and occasionally painful. Some people may have more discomfort during the removal process or even suffer from longer-term irritation following treatment.

The first step is to understand your skin type and the nature of the warts in question you want to treat. Warts may be small to large, located almost anywhere on the body, and cause varying degrees of discomfort. 

But how do you remove a wart safely without causing sensitive skin to become irritated? So, let’s see what the best option is next!

Best Method for Wart removal for sensitive skin.

When it comes to Wart removal for sensitive skin, it has to be done very carefully to avoid irritating or damaging the surrounding skin. To your relief, there are treatments of all kinds that can be gentle and also effective. We’re going to take you through the best wart removal methods specifically for people with sensitive skin, as shown below.

Over-the-Counter Treatments

The first thing people start with is over-the-head wart removal treatments since they are easy and convenient. The active ingredients in these products are generally salicylic acid or a cryotherapy spray that is meant to remove warts at a slower rate.

  • Salicylic Acid

How It Works: Softening and eventually breaking down the wart tissue through time is what salicylic acid does. The active ingredient hits the keratin inside the wart and dissolves it, allowing the wart to fall off itself.

Why It’s Ideal for Sensitive Skin: Salicylic acid is easily accessible in concentrations suitable for sensitive skin. Types are gels, creams, and pads to give more control. But it's essential to use a lower concentration when you begin.

How to Use: Put a small amount onto the wart and cover the surrounding skin with petroleum jelly to reduce the possibility of irritation. For several weeks, you’ll need to repeat the process until the wart disappears.

Pro Tip: Patch test the product before applying it to the wart. Now, your skin won’t rebel and have a negative response.

  • Cryotherapy Sprays

How It Works: The sprays work by freezing the wart, using a mixture of dimethyl ether and propane that kills and shrivels the tissue, and it falls off.

Why It’s Ideal for Sensitive Skin: Professional cryotherapy treatments use liquid nitrogen; cryotherapy sprays are much gentler. The formulation of these at-home sprays also has minimal irritation to the adjacent skin.

How to Use: Use the spray to apply to the wart directly as directed. The wart should freeze and fall off after a number of applications, though these can take anything from a few days to a couple of weeks.

Pro Tip: Do not spray the solution on non-wart areas of the skin. Then, apply your product to the location where you want it to go, using a cotton swab to limit the area.

Treatment by freezing – also known as cryotherapy.

Cryotherapy is one of the most common types of treatments for wart removal, including for very sensitive people. Freezing of the wart with liquid nitrogen destroys the tissue so that it breaks down and falls off in a few days.

What It Involves:

A healthcare professional does this with liquid nitrogen to freeze the wart. The procedure is rapid and works by damaging enough of the wart’s cells that it disappears. A blister forms around the wart after it has been frozen, and the wart comes off within a few days.

Why It’s Ideal for Sensitive Skin:

While cryotherapy involves freezing the wart, if performed correctly, this safe and effective option is acceptable for people with sensitive skin. The trick is to apply the freezing agent just right so it hits only the wart tissue, not the surrounding skin.

How to Use:

For those of you with sensitive skin, cryotherapy for wart removal should never be attempted at home and ideally shouldn't be done even by a trained professional. Exposure to liquid nitrogen can be irritating or even frostbite. The size and location of the wart may determine if it’s treatable in one session or may require multiple sessions.

Pro Tip: Side effects of cryotherapy include mild discomfort and redness after the procedure, but each should be short-term. Soothe the skin post-treatment with aloe vera gel.

Laser Wart Removal

Laser wart removal is an advanced method of treating warts by using a focused beam of light that damages the wart tissue. Being minimally invasive and precise, it’s an excellent option for people with sensitive skin.

What It Involves:

 If the treatment is done with a laser, a trained dermatologist uses the laser to highlight the wart, which consequently kills the wart’s blood vessels and causes the tissue to die. It's a very controlled process, and the doctor is able to avoid damaging the surrounding skin.

Why It’s Ideal for Sensitive Skin:

This laser removal procedure is a non-invasive one that usually has minimal to no irritation to the skin. Because the focused light energy is only applied to wart tissue, oversensitivity to surrounding sensitive areas is minimized. This treatment is perfect for deep and treatment-resistant warts.

How to Use:

Laser wart removal is done in a dermatology clinic or even in a unique medical setting. The procedure is quick, usually taking 15 – 30 minutes, depending on how many and how large the warts are. During the procedure, some mild discomfort occurs, but most patients find it tolerable.

Pro Tip: If warts are more extensive or more stubborn, several treatments may be necessary. Your dermatologist may tell you to use a mild moisturizer or ointment after the procedure to keep the skin moist and to relieve any inflammation.

Natural Wart Removal Remedies

Those with sensitive skin and those preferring a more natural approach can use several home remedies for wart removal. Gentler on the skin, but they may need to work more quickly, are these methods.

  • Apple Cider Vinegar

How It Works: You know that apple cider vinegar is acidic, so it should help break down the wart tissue. Acid from the vinegar may dry out the wart and make it come off.

Why It’s Ideal for Sensitive Skin: A natural remedy, the apple cider vinegar is often not as harsh a chemical. Yet it’s best not to use the vinegar straight away as it can irritate.

How to Use: Dilute apple cider vinegar on a cotton ball and put it on the wart. You apply a bandage covering it overnight for a couple of days, continuing the process until the wart is gone.

Pro Tip: Don’t use vinegar straight on the skin because it can lead to irritation; always dilute the vinegar with water (1:1 ratio).

  • Aloe Vera

How It Works: It is well known that Aloe Vera possesses properties that cool off and heal inflammation, which is why it’s the ideal cream for sensitive skin. Not only may it reduce irritation and help promote healing, but it also helps reduce the wart.

Why It’s Ideal for Sensitive Skin: It’s gentle and should keep the skin calm, therefore making aloe vera an ideal choice for delicate areas.

How to Use: After that, apply fresh aloe vera gel to the wart and leave it on for 15-30 minutes before you rinse it off. It should be repeated twice a day for the best results.

Pro Tip: Be sure to use a pure aloe vera gel that’s entirely additive and fragrance-free.

  • Tea Tree Oil

How It Works: The very antibacterial and antiviral properties of tea tree oil will get to work against the exact virus causing the wart. It also has a drying effect that could help clear the wart out a little at a time.

Why It’s Ideal for Sensitive Skin: Ingestion of tea tree oil is potent, but it's gentle when diluted correctly, which may make it a good choice for sensitive skin for that reason.

How to Use: If you have tea tree oil, mix it with a carrier oil and rub it onto the wart. Wash it off, but leave it on for several hours or overnight.

Pro Tip: Make sure to patch-test tea tree oil before you use it on larger areas. To see if your skin will react.

Wart removal for sensitive skin —Safety Tips

For those with sensitive skin, safety is a priority when removing warts. If you’re not careful, even the most gentle treatments can irritate. Below are practical safety tips to help you have successful wart removals and, at the same time, keep your skin protected.

Product patch test first.

Such skin is vulnerable to reactions -- so always patch-test any treatment or remedy you apply.

How to Patch-Test: Lightly apply a small amount of the product to some healthy skin (such as the inside of the forearm). Redness, itching, or irritation can occur one day or more after nanochemistry treatment; check after waiting 24–48 hours.

Why It’s Important: The use of patch testing can prevent established reactions to applying treatments directly onto the wart.

Protect the Surrounding Skin

For those with sensitive skin, the area around a wart is in itself as important as the wart itself.

How to Protect: During treatment, shielding the skin around the wart with petroleum jelly or a barrier cream is a good idea. It reduces the chance of exposure to harsh ingredients by accident.

Pro Tip: If using adhesive patches, be sure they stick only to the wart and not to sensitive skin.

Follow Instructions Carefully

For both over-the-counter treatments and professional services, whichever way you use them, make sure you do it exactly according to the given directions.

For OTC Products: Take just the dosage and frequency as advised. Using treatments too much can cause skin to become damaged or irritated.

For Professional Treatments: Make sure you know what post-treatment care is, keeping the treated area clean and hydrated.

Don’t Scratch or Pick at Warts

While we might find scratching at warts tempting, it can actually make things worse.

  • Why Avoid It: You can pick at warts, but this spreads the virus to other parts of your body or causes an infection. On sensitive skin, however, this can be more irritating and cause scars to form.
  • What to Do Instead: Bandage or patch the wart to keep from accidentally rubbing the wart.

If in Doubt – Choose professional treatments.

When OTC products or home remedies don’t work, the safest thing to do is to consult a dermatologist.

  • Why It’s Better: Treatments can be tailored by professionals according to your skin type, so they know that treatment will remove the wart without affecting delicate areas.
  • What to Ask: Bring your concerns, as well as options such as cryotherapy or laser removal, to discuss.

Be Patient and Consistent

For people with sensitive skin, wart removal can take a while. Rushing the process or switching treatments too much can be worse than good for your vitamin D levels.

  • Stick to a Plan: Change one method at a time over a few weeks before deciding if they have a good or bad effect.
  • Gentle Persistence: Treatments for sensitive skin have to be slower and gentler to avoid issues.

After Treatment: Hydration and Moisturization

When you remove your warts, it’s essential to keep your skin moisturized so that it can recover properly and to help prevent your skin from becoming dry.

  • Use Gentle Products: Go with unscented and hypoallergenic moisturizers suitable for sensitive skin.

Pro Tip: After treatment, apply a soothing cream that contains aloe vera, or chamomile extract to alleviate redness or irritation.

Schedules for Post-Treatment Care for Sensitive Skin

Whatever is causing your warts to look like they do, you’re going to need to take appropriate measures to make sure they don’t come back in the forms that make you uncomfortable and embarrassed at the end of the day. Treatment care is needed in the days following to minimize irritation and reduce the risk of scarring and recurrence. Now, let’s look at some ways you can help smooth your recovery.

1. Keep the Area Clean and Dry

Hygiene is the first thing to heal.

Why It’s Important: If the wart is removed with surgical or chemical agents, cleanliness prevents infections.

How to Do It: Gentle, lukewarm water and a mild fragrance-free cleanser can be used to wash the area. Dry it with a clean towel pat.

2. Avoid Sun Exposure

Sensitive 'healing' skin may be irritated by direct sunlight.

Why It’s Important: The darkening of scars or redness in treated areas can be caused by UV rays.

Protective Measures: If you can, put loose clothing over the affected area or use a broad-spectrum sunscreen with SPF 30 or higher.

3. Soothing Ointments or Creams can be used.

After wart removal, it is recommended that you care for sensitive skin extra carefully.

Recommended Products: Calendula cream, healing ointments recommended by a dermatologist, or aloe vera gel.

Application Tip: Rub gently until the treated skin isn’t irritated.

4. Avoid Harsh Skincare Products

For the healing phase, avoid products that contain alcohol, acids, or strong fragrances.

Why It’s Important: But these can cause irritation and slow down the recovery.

What to Use Instead: Choose hypoallergenic, non-comedogenic, gentle on sensitive skin products.

5. Monitor Signs of Infection.

It is essential to look for any unusual symptoms.

Signs to Look For: Sometimes, it might get red and swollen, fill with pus, and become more painful.

What to Do: If these symptoms occur, see your dermatologist immediately.

6. Maintain Regular Follow-Ups

If your skin’s too sensitive, periodic check-ins with a dermatologist ensure the treatment is effective and healing is on track.

What to Ask: Talk about what they are doing to help skin heal and prevent future warts.

Choosing Wart Removal on Sensitive Skin with Revitalize London

At Revitalize London, we provide gentle, effective treatments for sensitive skin. Our expert dermatologists understand the problems of getting rid of warts without irritating sensitive skin, and every procedure is designed to focus on your comfort and safety.

Sensitive Skin Tailored Treatment

From a safe topical solution to cryotherapy, advanced wart removal options, and laser therapy, we are able to provide the most advanced wart removal options. We take the time to make sure that your skin's specific needs are going to be met by our meticulous assessment and designing your personalized treatment plan for results.

Smart Technology

We use the most recent tools and techniques to perform precise, minimal invasive wart removal procedures. These are methods to minimize the possible discoloration, irritation, or scarring.

We are happy to contact you today to schedule your consultation and wart removal, especially for your sensitive skin!
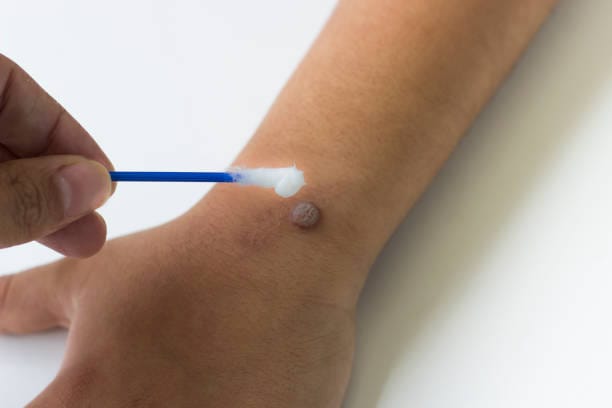
Read more...

Oral Medications for Nail Fungus: Are They Safe?

 oral medications for nail fungus

Onychomycosis, or nail fungus, is a fungal infection that affects millions around the world. It’s usually a tiny discolouration or thickening of the nail, and it can progress if left untreated. It can make the nail brittle, distorted, and painful. Besides impacting the appearance of your nails, nail fungus can be painful and becomes an even more significant issue if left untreated.

There are a number of different ways to treat nail fungus, and oral medications are often some of the best when it comes to treating more severe or widespread infections. Unlike other nail treatments available, these medications work inside out, targeting the fungus in the nail bed and the surrounding tissue.

Oral medications may be the best option if you have tried treatments for persistent nail fungus or have an infection that covers a large area and the topical treatments aren't clearing it up. However, as with any medication, there are risks and things to take into account. Here, we take an in-depth look at oral medications for nail fungus, including how they work, their benefits, risks of side effects, and how to minimise these risks. We’ll look at when these medicines are appropriate and what alternatives are generally available. This guide will walk you through the details you need to make a wise decision when choosing how to treat your nail fungus.

How do oral medications for nail fungus fit in?

Oral medications for nail fungus work from the inside out to kill or heal fungus through the root of the problem rather than the surface only. These drugs are usually only prescribed when the fungus has moved deep into the nail or when topical medicines haven't helped.

Commonly used oral medications for nail fungus

Oral antifungal medications, terbinafine and itraconazole, are the two most commonly prescribed ones. They both work by killing fungal cells by inhibiting the production of a critical component of the fungal cell membrane so that the fungus simply dies off. It is most often recognised as one of the best because it immediately attacks the fungus’s cell membrane, killing it in no time.

How Do Oral Medications For Nail Fungus Get Within The Nail

After taking an oral antifungal pill, the pill causes the fungus to circulate throughout your entire body, including to the nail bed in which the fungus lives. The medication builds up in the tissue of the nail and slowly fights the fungus over time. This mode of systemic treatment is highly effective, particularly for infections affecting several nails or otherwise hard to treat with topical applications.

Oral Medications For Nail Fungus: Treatment Duration And Its Effectiveness

How fast you’re capable of treating the infection is determined by the effectiveness of oral medication. Most fungal infections of the nails are complicated to treat because nails grow slowly. It can take several months for the medicine to clear the fungus and for the new healthy nail to grow. The usual length of time for treatment is 6 to 12 weeks, depending on the medicine and the severity of the infection.

When are Oral Medications most effective?

Those who have severe nail fungus, recurrent chronic infections or fungal infections affecting multiple nails may find oral medications helpful. Oral medications treat infections that would be hard to deal with otherwise, targeting the fungus in the bloodstream and nail tissue.

 oral medications for nail fungus

Oral Medications for Nail Fungus – Benefits.

One of the most effective treatments for prevailing infections is oral medications for nail fungus. Because topical treatments act only on the surface of the nail, only oral antifungals treat the disease at its source. Let's explore the key benefits:

1. Used to treat severe infections.

Severe nail fungus infections, which have affected more than one nail or have endured for a long time, are best treated by oral medications. Topical treatments may fail to reach fungal cells when the infection runs deep into the nail bed or across several nail beds. Oral antifungals are systemic, which means that they target the infection from within, so they do a better job.

2. Topical treatments are more convenient but ineffective

Topical antifungal treatments, such as creams or nail lacquers, can work but require extended-term use. Many people find this challenging, especially if their lives are too busy or consistency is particularly difficult. Differently, oral medications are taken as pills once or twice daily and are easy because you can take them conveniently. Once you begin the treatment, there is no need to remember to apply a topical treatment several times a day.

3. It deals with Nail and Skin Fungi at the same time

Not only can oral antifungal medications be effective for treating nail fungus, but they can also treat other fungal infections. Oral medications can treat fungal infections on your skin, such as on your toes, and also treat the same infection on your toenails, making the treatment easier and faster if you have both together.

4. Higher Success Rate 

It has a higher success rate for chronic infections than any other therapy but is not considered appropriate for new infections.

Oral medications are more successful than topical treatments for people who have chronic or recurrent nail fungus infections. Because these medications work from the inside out, they are more effective at targeting the infection and less likely to reinfect when the treatment is over.

Risks and Side Effects of Oral Medications for Nail Fungus

Oral medications used to treat nail fungus are very effective but do carry some risks and possible adverse effects. So, it’s essential to know about these so you can make an informed decision about your treatment. Below are some of the key considerations when using oral antifungal medications:

1. Liver Function Concerns

The most serious side effect of oral antifungal medicines (such as terbinafine and itraconazole) is that they can also affect your liver function. The liver processes these, and liver damage can occur in some cases with long-term use or when the person already has liver conditions. That is why your doctor will check your liver function with blood tests before and during treatment. If you have any symptoms like yellowing skin or eyes, dark urine or unusual fatigue, you should seek your doctor's advice immediately.

2. Gastrointestinal Issues

Oral antifungal medication can cause gastrointestinal side effects in some people. Diarrhea and, nausea, vomiting, and stomach pain are common. Most of these side effects are mild and go away when the body adjusts to the medication. But if these symptoms last or get worse, talk to your doctor about it.

3. Drug Interactions

Oral antifungal medications can interact with other medicines, including over-the-counter medicines and supplements. For example, heart medication may interfere with itraconazole, and terbinafine may interfere with the metabolism of blood pressure drugs. Tell your doctor about any medications you are taking, including prescription, nonprescription, herbal products and foods that are high in caffeine.

4. Skin Reactions

Skin reactions such as rashes, itching or blistering occur in some cases when taking oral antifungal medications. While they are generally uncommon, they can be severe. If you get a rash or have other signs of an allergic reaction, see your doctor right away.

5. Risk During Pregnancy and while Breastfeeding

Oral antifungal medications are usually not taken during pregnancy or breastfeeding except when medically necessary. Terbinafine and itraconazole are both pregnancy category C drugs, and they can potentially harm the fetus. If you are pregnant or breastfeeding, always consult with your doctor before starting any treatment.

How long does it take oral medications for nail fungus to work?

How long it takes for oral medications for nail fungus is one of the most important things to consider when taking oral medications for nail fungus. Nail fungus infections are chronic and can take months to clear completely, so you will need to have patience. Here’s what you can expect

 oral medications for nail fungus

1. You May Have To Wait For Weeks Before Initial Improvement

Oral medications for nail fungus are effective as soon as they enter your bloodstream but don’t show results straight away. It may take some time before you see much change because the drug is working to kill off the infection at its source in the nail root. In certain situations, you can wait a month before seeing improvement.

2. Full Treatment Duration: 6 to 12 Weeks

The complete treatment course for most people needing oral medications for nail fungus is 6 to 12 weeks, depending on the antifungal prescribed and how severe the infection is. This period slowly kills the fungus, and the healthy nail begins to grow back. However, it can take several months after the medication is finished before the nail fully regrows and the infection clears.

3. Regrowth of Healthy Nail

Nails do not grow back quickly, and it may take months to see a completely healthy nail. Fingernails grow out ultimately, on average, at 4 to 6 months, and toenails may take up to 12 months. That’s why you need to continue to take the medicine as directed, even if you aren’t seeing the results immediately.

4. Factors That Can Affect Treatment Time

The speed of recovery can vary based on several factors:

  • Severity of the Infection: In case of severe infection, treatment may take longer than if such an infection is localised.
  • Nail Growth Rate: Improvement will be made in nails that grow faster than slower-growing nails.
  • Overall Health: Depending on their immune system, some people will heal quicker, while others with diabetes or other health issues may need more time.

If you do not see your condition improve after the recommended treatment time, talk with your healthcare provider about alternative treatment options or things you can change about your treatment plan.

What Are the Signs That Oral Medications Are Needed for Nail Fungus?

Oral medications for nail fungus can be very effective, but they aren't the top treatment option. Before I dive into finding the best stocks, here’s something important you should know: when is the right time to consider them as an option? Take a look at some of the key signs that might be telling you it’s time to explore oral antifungal treatment.

  1. Chronic infection

Oral medications may be your best option when you have a severe or persistent nail fungus infection that does not respond to over-the-counter topical treatments. Topical antifungals often cannot treat severe infections that involve more than one nail or a more profoundly invading infection of the nail bed. In this case, oral medications can address the problem from within the body in a more complete way.

2. Topical treatments Were Ineffective.

Creams, ointments, or solutions that are applied to the nail are effective for many mild cases of nail fungus. If you have been using these treatments for several months without it helping, then oral medications for nail fungus might be the next thing you should try. The success rate for oral medications is higher than for topical medications, especially for those who are resistant to topical medications.

3. You have more than one nail affected

Oral medications are often advised to be used if more than one nail is infected or has spread to other nails. Because topical treatments are applied to individual nails, they may not be adequate for widespread infections. Oral antifungals are treatments that attack the problem systemically, giving you a better opportunity to kill off the infection in multiple nails at one time.

4. Underlying Health Conditions 

People with conditions like diabetes are more likely to get nail fungus. In cases where this is possible, oral medications offer a better option of treating the infection before problems arise. The effectiveness of oral treatments may also benefit people with compromised immunity or people taking medicines that affect the immune system.

5. The Infection Is Causing Pain or Discomfort

If nail fungus is painful or if it interferes with your daily activities, it's time to talk to your doctor about more effective treatment. Most often, oral medications for nail fungus work better at relieving the symptoms such as pain, tenderness, or thickened nails than topical treatments.

Oral Medications for Nail Fungus: How to Safely Take Them

Oral medications can be effective in treating nail fungus, but they have to be taken carefully to make sure they’re safe and work as well as they can. Here are some tips to ensure you get the best results while minimising risks:

1. Follow the Doctor’s Instructions.

Most importantly, when taking oral medications for nail fungus, your doctor will determine what dosage and timing will work best for you. The treatment for nail fungus using oral medicines requires you to be consistent with it for several weeks or even months before the infection clears, and you mustn't stop at an early stage of the treatment since the illness can recur or not be eliminated.

2. Do you get Regular Liver Function Tests?

Some oral antifungal medications can harm the liver, so people on these medications should have regular liver function tests. Usually, your doctor will closely watch your liver health, including blood tests, to see if the medication is causing any adverse effects. You should tell your doctor immediately if you notice symptoms like unusual fatigue, yellowing of the skin or eyes, or dark urine.

3. Taking a Good Diet

Oral medications for nail fungus may cause stomach irritation, so if your doctor thinks you should take them with meals, take the advice seriously. The medication may be taken with the meal to reduce gastrointestinal side effects such as nausea or upset stomach. But never take the medication the way you do without following the exact instructions your healthcare provider or pharmacist gives you about how to take it.

4. Stop Drinking Alcohol During Treatment

To help avoid liver issues and ensure the medication works, avoid alcohol when taking any oral antifungal medication. Some antifungals can interact with alcohol, increasing your risk of liver damage. Based on this, alcohol can also disrupt the proper process of the effects of the medication in your body, potentially making it ineffective.

5. Be Aware of Drug Interactions

If you take oral medications for nail fungus, they can interact with many other medications you take for a heart condition, high blood pressure, or others. Before starting treatment, be sure to tell your doctor about all other medicines you are taking, including over-the-counter drugs and supplements. By following these guidelines, there's a way to avoid any drug interactions that may affect the dosing plan, causing a bad reaction or an interfering side effect.

6. A Complete Full Course of Treatment

It’s essential to finish the entire prescribed course of oral medication, even if you don’t notice any symptoms or think that the infection has cleared up. Re-emerging infection from stopping treatment too early may be caused by the fungus not being wholly eradicated. If you have nail fungus, patience is key, and getting through the treatment as directed is your best bet for fully recovering from it.

Why should you choose Revitalize London for nail fungus treatment?

We know at Revitalize London how uncomfortable and frustrating it can be to have a nail fungus infection. We want to give you the best options to get your nails back to a normal, healthy state as soon as possible and as safely as possible. Here’s why you should choose us for your nail fungus treatment:

1. Personalized treatment in an environment of expert care for your child

We assemble a group of proficient specialists who will take a customised approach to each case to guarantee that you get the treatment that you require. If you need oral medications for nail fungus, laser therapy, or both, we’ll get together to create a personal plan of action for optimal results.

2. Advanced Technology

At Revitalize London, we use the most modern medical technology, such as laser, to solve nail fungus non invasively and efficiently. Fast and painless, our advanced laser therapies are designed to target the fungus directly.

3. Comprehensive Aftercare

In addition to treating infection, we provide complete aftercare to ensure long-term success. Your team will help you with good nail care, hygiene practices and how to avoid reinfection, maximising your chances of a lasting result.

4. Convenient and Comfortable Environment

At Revitalize London, we have it as a priority to help you feel relaxed. At our clinic, you are offered a clean, welcoming and professional place to get your treatment. The key aspect is that we keep your experience as smooth and stress-free as possible.

5. Proven Results

We deliver effective treatments that produce results our clients notice. We operate with a commitment to high-quality care and patient satisfaction and are confident that we can safely and efficiently help you manage and eliminate nail fungus.

If you’ve had a problem with nail fungus, don’t wait any longer – call Revitalize London today to book a consultation to get started on the road to healthy nails!

Read more...

Nail Fungus and Diabetes: How to Manage Both Safely

Nail Fungus and Diabetes

You may already know if you have diabetes and all the health risks that come with it. Although most people know that wearing shoes too tightly can cause a few problems, one of the most overlooked issues is an increased chance of developing nail fungus. Diabetes and nail fungus are related, and how each one affects the other is essential to keep in mind when treating both of these conditions safely.

Diabetes makes it easy for infections — such as nail fungus — to take root. Diabetes weakens the body's immune system and impairs circulation. Your feet are the biggest target for nail fungus because fungus grows in warm and moist environments, and if you have diabetes, you are especially vulnerable. Nail fungus infections can take a while to go away, and because poor circulation and high blood sugar can make your body a poor candidate for healing, you’re more likely to have complicated consequences.

But don’t worry! With proper awareness, as well as being proactive about your care, you can control both diabetes and nail fungus. At Revitalize London, we provide specific care as we treat only what’s needed for your condition. Our ultimate goal is to help you feel your best, no matter what. 

Onychomycosis, or nail fungus, is a common infection of the nails that affects toenails with greater frequency than fingernails. Caused by a fungal infection, most commonly dermatophytes, it happens when the fungi invade the nail bed, discolouring the nail and making it thick and brittle. Since diabetes patients have a weakened immune system and are at risk for poor circulation, it is even more critical for them to control nail fungus properly.

Risk Factors for Nail Fungus

People with diabetes face several risk factors that make them more susceptible to nail fungus, including:

1. Poor Circulation: Damage to blood vessels from high blood sugar can cause poor circulation and hamper your body’s ability to deliver oxygen and nutrients to some body parts, like nails. These infections are more complicated to heal and more likely to spread because of this slow circulation.

2. Weakened Immune System: Not only does diabetes affect your immune response, but it also makes you more prone to get fungal infections. As the years go by, your body gets less and less able to fight off fungi so that they can grow out of control quickly.

3. Moisture: Excessive sweating is often a problem for diabetics, particularly in the feet. It also makes the perfect breeding ground for fungi that grow better in warm and damp conditions.

4. Nerve Damage: Diabetes can lead to neuropathy or nerve damage, which numbs your feet and can make early detection of fungal infections difficult. You may not feel it or notice when an infection starts.

Symptoms of Nail Fungus

Fungus that creeps into the nails usually begins near the tip of the nail and gradually works its way under the tip. Common signs include:

  • Discoloration of the nail, yellow, white, or brown.
  • Thickened or brittle nails.
  • Crumbling or breaking nails.
  • A smelly infected nail.
  • Especially when wearing shoes, you may feel pain or discomfort.

People with diabetes need to know all about the risk factors and symptoms of the infection because early detection will stop the infection from worsening. If any of this sounds familiar, don’t wait! Seeing a doctor soon is important so further complications are avoided.

 Nail fungus And Diabetes: What are the effects? 

Because diabetes is a systemic condition that encompasses many parts of the body, it can affect your nails. Uncontrolled blood sugar levels can lead to a number of changes that make your nails more prone to infection, including nail fungus. Diabetes affects nail health; let’s figure out how and why controlling your blood sugar is so essential for your nails.

Nail Fungus and Diabetes

1. Blood Sugar at Raised Levels Causes Weaker Nail Health

High blood sugar over time can damage blood vessels and reduce circulation throughout your body, especially in your feet and hands. Because your blood does not circulate properly, it is more difficult for your body to carry oxygen and nutrients to your nails, which causes weak, brittle and more easily infected nails. This can, over time, increase the risk of nail fungus that grows in these environments.

2. Reduced Immune Function

In other words, in order to defend your body against infections, including nail fungus, you must have a well-functioning immune system. Unfortunately, diabetes can further weaken the immune system, making it less effective in identifying and eliminating dangerous fungi. One reason why people with diabetes are particularly prone to infections, such as nail fungus, is that they are more likely to have problems with their circulation. If untreated, these fungal infections get more complicated and can be much harder to treat.

3. What Happens: Reduced sensitivity and nerve damage.

Neuropathy (nerve damage) — is one of the most common complications of diabetes. Nail fungus can be challenging to recognise because neuropathy causes numbness or decreased sensation in the hands and feet. As a result, fungal infections can get worse before you even start to notice, which can lead to complications. You do not feel any pain, while you increase your chances of worsening infection by not caring for your nails properly.

4. Sweating and Moisture

Additionally, diabetes may cause excessive sweating, typically in your feet. If you frequently have your feet feeling damp or they tend to sweat excessively, this can increase your chances of getting nail fungus, especially if you have diabetes.

Once you know how diabetes affects your nails, you can take control and make sure your nails stay healthy and do not become infected. If you do get nail fungus, keeping your blood sugar levels under control, practising good foot hygiene and checking your nails may help prevent it.

Why Someone with Diabetes Is More Likely to Have Nail Fungus

However, diabetes isn’t just about blood sugar; it can affect any part of the body, including your nails. Several other factors make those with diabetes more vulnerable to nail fungal infection. Let’s take a closer look at why people with diabetes are at a higher risk for nail fungus and what to do about it.

Nail Fungus and Diabetes
1. Compromised Immune System

We know for a fact that one of the significant challenges people with diabetes have to deal with is a weak immune system. As blood sugar levels get higher, white blood cells — the fighter cells of the immune system — don't work as well. A less active immune system makes it easier to develop and spread fungal infections such as nail fungus. Because they attack the cells in our body that generally work to defeat them, the body's natural defence against fungi is compromised, making it more challenging to fight the infection after it is infected.

2. Poor Circulation

Diabetes is another risk factor for nail fungus because of poor circulation. High blood sugars damage blood vessels, especially in the hands and feet, and restrict blood flow. This all slows down healing time, making it easier for infections to hang around and harder for the body to fight them off. However, fungi only grow where it’s dark and damp, such as within the toe, where blood flow is limited. If your circulation is poor, then clearing a nail fungus is even more complex, and the fungus can grow more quickly.

3. High Blood Sugar Levels

High blood sugar levels constantly create an environment that is good for the fungus to grow. They love warmth and moisture, plus more sugar in the bloodstream can cause moisture or dampness in the body — including the feet. High blood sugar can also make the body less likely to heal wounds well, resulting in cracks or cuts in the nails or skin that fungi can get into.

4. Nerve Damage

Many people with diabetes also have diabetic neuropathy or nerve damage, which mainly affects the lower limbs. People with diabetes will not feel, or feel as much, in their feet — so when an infection starts, they might not even detect it until it’s worse. If untreated, a minor fungal infection that doesn't seem to be noticed can spread quickly and get much worse.

5. Increased Sweating

Excessive sweating, particularly in the feet, is common for people with diabetes. And that creates the perfect environment for fungi to grow. Fungal infection loves moist, warm conditions, and the feet are the ideal spot for this. Since fungal spores can enter through minor cuts or damaged skin on the nails, fungal infections are more complicated to manage and treat.

People with diabetes are more prone to nail fungus due to all of these factors: a weakened immune system, poor circulation, high blood sugar, nerve damage and increased moisture. There are ways to reduce the risk of fungal nail infection, including being careful in managing blood sugar levels, keeping the feet clean and healthy, and seeking early treatment of any diseases, sores, and rashes on the feet. Understanding these risks and taking proactive approaches are actually the keys to preventing and treating nail fungus in people with diabetes.

Symptoms to Watch Out for

Nail fungus might be more dangerous if you have diabetes: You may need to get help immediately to prevent further complications when you have diabetes. Nail fungus often begins very slowly and can even mimic other conditions, making it essential to recognise what to watch out for — especially if you have diabetes. In some cases, the early signs of nail fungus are subtle, but you should not miss them.

1. Discoloration of the Nail

The discolouration is one of the most apparent signs of nail fungus. The yellow, white or even brown-looking nail might begin to show. The first visible sign is that something is off. In diabetics, poor blood flow and a weaker immune response may make discolouration more noticeable and increase the infection's chances of spreading.

2. Thickened Nails

As fungal infection grows, the nail may become thicker and more difficult to trim. The fungus infects the nail bed and thickens the nail because the nail grows abnormally. This also makes my nail more likely to break and crumble, but it's painful: applying pressure through shoes to the nail.

3. Brittle or Crumbling Nails

The nail may not just thicken but also get brittle and crumbly. It occurs when the infection weakens the structure that makes up the nail. This can be a real problem for people with diabetes since brittle nails are more likely to crack and break and create an entrance for fungal or even bacterial growth.

4. Foul Odor

Fungal infections also have a foul odour, which is often added as the infection progresses. If your feet or nails have a strange smell, this might be fungus. However, this can be a very distressing symptom and one that should not be ignored since if this symptom occurs, it is probable that the infection is advancing and needs immediate medical attention.

5. Pain or Tenderness

Some people with nail fungus have pain or tenderness in the area of the affected nail, but that’s not always the case. The level of pain ranges from mild pain to greater aching. The problem for people with diabetes is they may not feel pain or discomfort because they may have nerve damage. That’s why diabetic individuals should have regular foot checks and look out for signs of nail fungus.

6. The Separation Of The Nail From the Nail Bed.

In severe cases, the fungus may separate the nail from the nail bed. If left untreated, however, this condition, called onycholysis, can develop into something more serious, like a bacterial infection. It’s a sign the fungus has spread and needs professional treatment before permanent damage to the nail.

When to Seek Medical Help

If you have diabetes and you spot any of these symptoms, check with a doctor as soon as possible. On your own, nail fungus can be challenging to treat, and treatment may not work if waited because the fungus can progress and worsen to severe infections or permanent damage to the nails.

Nail fungus And Diabetes: Complications

Nail fungus, while having diabetes, can cause serious problems. Fungal infections are more dangerous for people with diabetes because they have a weakened immune system, poor circulation and slow healing. In order to effectively manage nail fungus and diabetes, these risks need to be understood.

1. Spread of the Infection

If untreated, for people with diabetes, nail fungus can spread to the surrounding skin and other infections can set in. Because of this, the weakened immune response in people with diabetes makes them more vulnerable to an attack by the fungus, causing pain, redness and swelling. In rare cases, antibiotics or surgery to remove the infected nail may even be needed.

2. Increased Risk of Foot Ulcers

Nail fungus can damage the skin around the nails, leading to sore cracks or breaks in the skin. The openings from which bacteria can get into the foot and upsets the risk of foot ulcers. Foot ulcers are a particular problem for people with diabetes partly because they are slow to heal and can develop into infections deep in the tissue or even in the bones.

3. Gangrene and Amputation

In very rare cases, things may get even more severe when untreated infections may result in gangrene – the death of tissue due to a lack of blood supply. Gangrene is a serious medical emergency that can lead to amputation if it can not be treated. While it is not common, people with diabetes must approach nail fungus seriously to avoid the remotest chance of it getting to this stage.

4. Chronic Pain and Discomfort

Completely thickened, crumbly, or brittle nails can be very uncomfortable if you have to wear shoes. If you have diabetes, it can affect your ability to move around, which can make it challenging to stay active. It also can cause a further impact on blood sugar management, thus deteriorating overall health.

How to Prevent Complications

People with diabetes should make foot care a priority, and if they notice any sign of nail fungus, they should take care of it immediately to avoid these complications. Severe outcomes can be significantly reduced with regular check-ups with a healthcare provider, controlling blood sugar levels to a normal level, and maintaining proper hygiene.

Why choose Revitalize London for nail fungus treatment?

As Revitalize London, we see the one-of-a-kind difficulties of dealing with toenail fungus and diabetes. At our practice, we have an expert team that provides an individual approach to treatment, and it combines advanced therapies and a profound knowledge of diabetic foot health. Whatever your foot care needs, our targeted antifungal therapies and complete foot care will ensure your comfort and safety. With cutting-edge technology and effective results, our state-of-the-art clinic is better than first grade. We’ll help you get back to healthy, fungus-free nails and remain well. For professional, compassionate care delivered to you, choose Revitalize London.

This is your journey to better nail health!

Read more...

When to See a Doctor for Nail Fungus: Signs and Symptoms

Doctor for Nail Fungus

You may be more prone to nail fungus, also called onychomycosis, than you think. It begins slowly, like a little tiny white or yellow dot on your nail. After a while, it can worsen, resulting in discolouration, thickening and even pain. Although home remedies can often help with some cases of nail fungus, it isn’t always the case.

Therefore, when to see a doctor for nail fungus? When it’s the best moment to visit a doctor, neglecting every symptom is often a huge mistake. In this guide, we’ll explore when to see a doctor for nail fungus and which signs not to ignore. You may be noticing slight changes in your nails or dealing with a nasty infection, but one thing's for sure: if you know what to watch for, you can get your nail health back in shape.

What Is Nail Fungus?

Nail fungus is an aggravated fungal infection affecting the nails and is generally initiated by a slight discolouration or spot under the nail. Warm and damp places are where it grows best, and if it isn’t dealt with, it will spread faster than you can imagine. Fungi living in shared spaces like swimming pools, gyms or public showers and wearing tight, sweaty shoes are common causes of nail fungus. 

Unlike a common cold, nail fungus affects some people more than others. If you fit into one of these categories, then pay more attention to your nail health.

Firstly, nail fungus may appear to be a superficial problem that affects appearance only, but it can become worse with time. It’s important to know when to see a doctor for nail fungus. Getting help early can prevent future discomfort, embarrassment and the possibility of complications.

Early Signs of Nail Fungus

If you spot the early signs of nail fungus, knowing when to see a doctor for nail fungus depends on when you caught it. Look out for these key symptoms:

1. Nail Discoloration

  • Under the nail, small white, yellow or brown spots may appear.
  • These patches can spread over time so that the nail is discoloured and even looks uneven.

2. Thickening of the Nail

  • Infected nails' surfaces often become thicker than usual.
  • They may also be brittle, crumble or split at the edges.

3. Foul Odor

  • A foul smell from the nail may be a sign of a fungal infection.
  • Other visible changes usually accompany it.

4. Tenderness or Discomfort

  • Pain or tenderness around the infected nail may be mild.
  • If the infection spreads or isn't treated, it can be worse.

It is essential to recognise these signs at this early stage. If home care doesn’t improve nail fungus symptoms or they get worse, you need to see a doctor. If diagnosed in a timely manner, it helps prevent complications and saves your nail health.

Doctor’s Visit 

The first step towards clear and healthy nails is to know when to see a doctor for nail fungus. Here’s a breakdown of what you can expect during your consultation:

Doctor for Nail Fungus

1. Detailed Examination

  • The doctor will check the nails and skin around them that are affected.
  • They will look for signs of the infection, such as thickening, discolouration or separation of the nail from the nail bed.

The problem can also be solved by asking questions about your medical history and lifestyle habits, like exposure to shower facilities or wearing tight shoes.

2. Laboratory Testing

Labs analysis of a small sample of your nail or surrounding skin.

This test determines the type of fungus causing the infection, so your treatment can be specific to your needs.

Other conditions, such as psoriasis or bacterial infections, can look like a nail fungus, so other conditions are ruled out by testing.

3. Tailored Treatment Plan

Once you are diagnosed, your doctor will create a treatment plan tailored to you. Options include:

Topical Medications:

Your doctor prescribes creams or nail lacquers to attack the infection specifically. These best suit mild to moderate cases and have to be applied consistently for several months. 

Oral Antifungal Medications:

In severe cases, pills such as terbinafine or itraconazole will help treat the infection. However, they are effective, and the side effects should be monitored.

Laser Therapy:

A modern, non-invasive light energy treatment that eliminates fungal cells. Laser therapy is pain-free and without downtime, making it an excellent option for stubborn infections.

Surgical Nail Removal:

In extreme cases, the nail may be so infected that it has to be cut out to allow healthy regrowth. It’s usually only considered when other treatments have failed.

 Follow-Up Care

Follow-ups may be scheduled with your doctor, who will monitor the progress of the treatment in order to ensure that the infection is eliminated.

They’ll give you advice on how to stop yourself from getting reinfected by keeping your nails clean, using antifungal sprays and avoiding damp environments.

Getting professional treatment means the infection is treated well and doesn’t lead to complications like permanent nail damage or additional spreading. If you know when to see a doctor for nail fungus, you can save yourself time, discomfort, and future problems.

Risks of Ignoring Nail Fungus

The pressure of treatment of nail fungus can develop serious complications. Understanding these risks makes it easier to figure out when to see a doctor for nail fungus and how important it is to do so.

1. Worsening of the Infection

Nail fungus does not typically improve without treatment, and it can get worse over time.

The deeper the infection spreads into the nail, the more it can discolour, thicken or become brittle.

In severe cases, the nail may fall off the nail bed and be permanently damaged.

2. Spread to Other Areas

Fungal infections like this require warm, moist environments and can spread to other areas of the skin with ease.

If Left untreated, nail fungus can lead to athlete’s foot, characterised by itching, redness, and peeling between the toes.

In some cases, the infection can affect other parts of the body, especially in those with weak immunity.

3. Pain and Discomfort

Nails that are thick or distorted can press on the surrounding skin, and this can be extremely painful.

For the most part, this pain becomes worse when you wear shoes, walk or do other routine activities.

This can cause inflammation and swelling and can be further complicated.

4. Secondary Infections

Fungus nails may increase the risk of bacterial infections in people whose immune system is impaired, as well as in people with poor circulation.

Redness, swelling, warmth or pus around the nail are signs of secondary (follow-up) infection.

If not treated, these infections could get serious and need more aggressive medical treatment.

5. For At Risk Individual Complications

Those with diabetes or circulatory problems are at greater risk of complications.

Untreated, minor fungal infections can cause foot ulcers, cellulitis or systemic diseases.

In older people, weakened nails may lead to the discomfort of being prone to falls or injury.

6. Impact on Daily Life

If the infection covers visible fingernails, untreated nail fungus can affect self-esteem and confidence.

Infections may also interfere with daily activities, such as walking, exercising or wearing open-toed shoes without discomfort.

Not seeing a doctor about nail fungus when you should can cause lasting problems with your nails beyond just your general health. Early treatment ensures that the infection is treated correctly and complications are avoided.

What Doctors Do About Advanced Nail Fungus

Medical professionals have some solutions for advanced infections, such as if you’ve waited too long to address the infection or it progressed too far. Although there's no perfect cure for nail fungus, seeing a doctor sooner rather than later can make a big difference in how well the condition can be treated.

1. Prescription Oral Medications

  • Common Medications: Advanced fungal infections may be treated with drugs such as terbinafine and itraconazole.
  • How They Work: The advantage of these medications is that they attack the fungus from within – at its root.
  • Duration: Improvement is usually noticeable as new healthy nails grow, and treatment may last several weeks or months.
  • Considerations: These medications can have side effects, so you may need blood tests to monitor your liver function during treatment.

2.  Topical treatment

Oral medications are typically combined with prescription-strength topical treatments to be more effective.

Examples of medications that penetrate thickened nails to combat the fungus directly are medicated nail lacquers or creams.

These treatments take a lot of work and time to show results.

3. Laser Therapy

How It Works: Laser induces the target cells to produce tiny gas bubbles, which tear the cells apart while surrounding tissues are unaffected.

Benefits: It’s proper technology, non-invasive, pain-free and no downtime, making it ideal for stubborn infections.

Effectiveness: When combined with other treatments, laser therapy results are often best.

4. Nail Removal

Partial or Complete Removal: Severe damage may require doctors to remove part or all of the infected nail.

When It’s Done: It’s reserved for when all other treatments have failed or when the nail is extremely painful.

Recovery: However, nails usually grow back healthy, often over several months.

In most cases, maintenance treatments, including medicated nail solutions, creams or antifungal sprays, are advised to prevent regrowth.

Why Medical Treatment Is Important 

More effective treatment is needed and can only be offered by a doctor in advanced cases. If you ignore when to seek a doctor for nail fungus, it might result in damage to the nail permanently, additional infections or issues with those in danger risk.

Nail Fungus: Preventing Recurrence After Treatment

But there’s only half the battle won in the successful treatment of nail fungus; just as important is preventing it from coming back. Following preventative measures will help to keep your nails healthy for the long term once you know when to see a doctor regarding nail fungus.

Doctor for Nail Fungus

1. Prioritize Nail Hygiene

Regular Cleaning of Your feet: wash them every day with soap and dry them well, drying in particular between the toes. 

Proper Grooming: You can also help prevent ingrown nails, which are more prone to infections, by trimming your nails straight across. Use sanitised tools, and never share clippers or files.

Moisture Control: Use talcum or antifungal powder to dry your feet, mainly if you sweat excessively.

2. The Right Shoes and Socks

Wear different pairs of shoes from one day to another; they need to dry completely.

But to kill fungal spores, you have to do it regularly with antifungal sprays inside your shoes.

Pick socks made from materials that will absorb sweat and keep your feet dry.

3. Be Cautious in Public Areas

Fungal infections are 'hot spots' in communal spaces such as swimming pools, gyms and locker rooms.

In these environments, always wear waterproof sandals or flip-flops for your feet.

Don’t walk barefoot on damp surfaces since fungi can remain there for a long time.

4. Integrate antifungal products

As a preventative measure, apply over-the-counter antifungal sprays or creams to your feet and around your nails.

Nail lacquers that are prescription strength can act as a barrier to guard against reinfection in newly grown nails.

Also, extra protection can be obtained by using foot soaks with natural antifungal agents, such as tea tree oil or apple cider vinegar.

5. Boost Nail Health

To increase the strength against infections, strengthen your nails with nourishing oils like jojoba or vitamin E.

When it comes to strong, healthy nails, include supplements in your diet such as biotin or zinc.

6. Monitor Your Nails Regularly

Check for early signs of discolouration, swelling, and unusual changes in texture.

If you notice these symptoms, see your doctor quickly so that you can avoid a full-blown infection.

Why Nail Fungus Often Recurs

Fungal spores can stay in your environment, in your shoes, or even under your nails — meaning you may have problems again and again.

If the preventative steps are neglected, reinfection is common even for high-risk individuals, such as athletes or people with diabetes.

Prevention Is Key

Now that you know when to see a doctor for nail fungus and when to get treatment for nail fungus, you can start paying proactive care to your nails, making sure they are fungus-free and healthy. The more that you prevent, the less you will feel discomfort and lose your confidence, and it will save you from constant medical interventions in case something goes wrong in the future.

Why You Shouldn’t Delay to See a Doctor About Nail Fungus

You might think that nail fungus is something that can wait, but it’s not. Knowing when to bring up nail fungus with your doctor prevents the condition from becoming worse than it needs to be.

  1. Prevent Pain and Discomfort

The fungus can advance to cause nails to become thick, press against the skin and result in continuing pain.

Walking, wearing shoes, or standing for long periods can become uncomfortable and unbearable.

  1. Avoid Secondary Infections

If you don’t treat it, the nail fungus will weaken the nail structure and provide an entry point for bacteria.

This can result in redness, swelling, or pus-filled as a result of an increased risk of secondary infection.

Such complications can be life-threatening for people with diabetes and can result in ulcers or cellulitis.

  1. Protect Surrounding Areas

Conditions like an athlete's foot can quickly spread to your nails or your skin.

The good news is that early treatment is critical to containment since the risk of infecting others also increases in communal spaces.

  1. Prevent Long-Term Nail Damage

When the infection clears, however, the nail bed can permanently be deformed.

In some cases, you may not have nails that grow back well, or people may have aesthetic and functional concerns.

  1.  Take advantage of Tailored Treatments.

The type of fungus can be diagnosed, and doctors can suggest the best treatment plan.

Professionals source antifungal medications from oral or topical or even use laser therapy to ensure a higher success rate than over-the-counter products.

  1. Save Time and Money

Not treating the infection could put you at risk of having costly procedures, like nail removal or advanced therapies, in the future.

Shorter treatment durations and fewer follow-ups are often needed to improve outcomes early.

A Simple Step to Have Peace of Mind

Getting early help isn’t just about your nails, it’s about your overall health. Knowing when to see a doctor for nail fungus is essential to avoid the pain, complications, and expenses that can follow. By acting quickly, you can get ahead of the problem so that the issue does not grow.

Why Go For Revitalize London for Nail Fungus Cure?

We know how lousy nail fungus can make you feel; that’s why we’re part of the Revitalize London team. Advanced, effective treatments are available at our clinic, specifically designed to address your needs so you can get the best care.

Expert Care You Can Trust

We have a team of professional staff to diagnose and treat nail fungus at any stage.

Using laser therapy, we give you precision, lasting results with our technologies that are at the forefront of the industry.

Customised Treatment Plans

The success rates are based on your specific condition, so we design personalised solutions for you.

Topical treatments, oral medications, or a combination of these, we’ve got you covered.

Preventive Care Guidance

We offer precise aftercare instructions to help prevent reinfection and necessary healthy nails!

However, we also provide ongoing support to maintain fungus-free nails long after your treatment.

We make your health and satisfaction our top priority at Revitalize London. We promise to help you get over the fear and regain your trust in your nails with safe, secure and professional care.

Read more...

Home Remedies vs Medical Treatments for Nail Fungus: What’s the Best Option?

Medical Treatments for Nail Fungus

If there is one condition you don’t want to have, nail fungus is – a common medical condition that can happen to anyone and affects both hands and feet. Often the spot starts small and brown underneath a nail and slowly increases to make the nails thickened and brittle. For many people, the question arises: If they decide to use home remedies for nail fungus vs medical treatment, then?

Many natural solutions promise relief, but in the case of extreme cases professional treatments will be faster and more likely to be effective. So, choosing the right treatment is important to stop the infection from getting worse and help keep your nails healthy.

In this article, we're going to go over the home remedies and medical treatments for nail fungus, talking about how well they work and what they can and can't do for you. Here we explain whether you should use a natural treatment for nail fungus at home or whether you should visit a professional and get expert treatment for the problem. 

What is Nail Fungus? 

Nail fungus or onychomycosis is a fungal infection that starts as a small discoloration on the tip of your nail. It can spread and, if untreated, will cause the nail to get thick, brittle, and deformed. Nails are infected — usually toenails but sometimes fingernails, too.

Fungal infections cause nail fungus; these fungi love humid environments. Dermatophytes are fungi that attack the nail and outer layers of the skin. Less common, nail infections can also be caused by yeast and mold. These fungi can slip through small cuts or even cracks in the nail bed, or prolonged exposure to moist spots, like public showers or the deep end of the pool.

The infection usually starts with a small white or yellow spot under the nail. While the fungus spreads the nail may:

  •  Change color.
  • Become thick and crumbly. 
  • When severe, it can also cause pain when it inflames, making it hard to wear shoes or walk comfortably. 
  • Nail fungus can be contagious, so be careful about spreading it from one nail to another or yourself or someone else.

Because nail fungus looks like other nail conditions, such as psoriasis, it's important to know the difference. Nail fungus mostly affects the color and texture of the nail, whereas psoriasis commonly leads to pitting and uneven nail growth.

Before you can decide whether home remedies for nail fungus vs medical treatments are the right choice for you, it helps to understand nail fungus. The Key is proper diagnosis and treatment if you are to resolve the infection and return to your optimal nail health.

The Importance of Treating Nail Fungus Early: Why Waiting Isn't an Option 

Medical Treatments for Nail Fungus

Even if it’s only a small spot or slight discoloration, it can be tempting to ignore nail fungus. Yet, if you don’t treat it, it can become a much bigger problem later on. While this may appear cosmetic at first, ignoring nail fungus even for a while can develop into a chronic, painful problem with your nails, activities of daily living, and overall health.

The earlier you treat it, the less likely it is to spread. It starts with one nail, but it can easily be transferred to other nails, skin, shoes, and socks if left untreated. It is highly contagious and can get worse and spread to other parts of the body, such as your feet, causing athlete's foot or other fungal skin infections if not treated. And it's especially concerning for people who use public showers or swimming pools.

Furthermore, the more time that passes before you handle nail fungus, the more problematic it is to resolve. It gets steadily worse, and nails become thicker, discolored, and brittle. As the infection continues, the nail may start to separate from the bed, which causes pain, and the person may also experience discomfort when they walk or put on shoes. It can make a big difference to the quality of your life.

If you have a weakened immune system due to diabetes or circulatory problems, untreated nail fungus is particularly dangerous. If left untreated, the infection can move further into the body and cause even worse health problems. In such cases, early treatment is needed to avoid such complications, which might be dangerous.

In the end, if you are going to try home remedies for nail fungus vs medical treatment you will need to do it now. Treating nail fungus as soon as you can, as opposed to later, is to avoid unnecessary pain and discomfort and reduce the risk of the infection spreading. Don’t wait for it to get worse, take control of your nail health today!

 Nail Fungus Home Remedies vs. Medical Treatment

Several people will not be able to make up their minds as to whether they treat nail fungus at home or go for professional medical treatments to get rid of the condition. Of course, the pros and cons exist on both options, and we must understand what will work in our case. 

Medical Treatments for Nail Fungus

Home Remedies for Nail Fungus: Natural Solutions

In recent years, home remedies for nail fungus have become very popular because they are accessible, inexpensive, and are perceived as a safer and more natural alternative to medical treatments. Some of these remedies may or may not work, depending on how severe the infection is, and can help with mild cases, but they may not work for more severe ones. Commonly used home remedies are let us take a closer look at a few:

1. Tea Tree Oil

One of the most well-known natural treatments for nail fungus is tea tree oil. The antifungal and antiseptic properties of this oil are thought to be able to kill the fungus on your toes as well as prevent it from spreading. A small number of drops of tea tree oil: rub a few onto the nail and surrounding skin twice a day. There’s some evidence to show the benefits for some people, but it is mixed. Mild cases of fungal nail infections may be treatable with the use of tea tree oil but it may not be potent enough to get rid of persistent nail fungus.

2. Vinegar Soaks

Apple cider vinegar is another home remedy for nail fungus due to its acidic properties, which help balance the pH of the nail bed and make it less suitable for fungal growth. The best way is to soak your feet in a tub of warm water and vinegar for about 15 to 20 minutes per day. Vinegar soaks, although, and while they may show some improvement in weeks or months are unlikely to work on more severe cases.

3. Garlic

Allicin, a compound in garlic, is antifungal. Some people swear by eating crushed garlic cloves and then applying the paste to their affected nails or using garlic oil. While garlic has some antifungal properties, it usually isn't enough to clear a nail fungus problem, even in mild cases. It is like other home remedies that need to be applied regularly and may need considerable time to produce results.

4. Coconut Oil

It's been said that coconut oil is great for moisturizing as well as antifungal purposes. Some apply it as a topical treatment to ease the nail bed and slow the spread of the fungus. Coconut oil is still being debated whether it can treat fungal infections, but it can help with dry and cracked nails. While it can help with symptoms, it probably won’t completely get rid of the infection.

Medical Treatments for Nail Fungus: Professional Solutions

There are more targeted and better-proven medical treatments for nail fungus available that will work faster and seriously knock out the fungus. If home remedies do not work or the infection is quite serious, medical treatments are often recommended.

1. Prescription Antifungals Topical

For moderate nail fungus infections, medicine applied directly to the infected area, such as ciclopirox (Penlac) or efinaconazole, may be prescribed by your doctor. These are applied directly to your infected nail and attack the infection over time. However, they will require consistent application over several months for them to work effectively; some may not penetrate the nail deeply enough to cure the infection. Although topical treatments are often a good place to start and often sufficient for mild infections, they may not be sufficient when infections are severe.

2. Oral Antifungal Medications

Most cases of nail fungus are difficult to treat, and oral antifungal medications are generally more effective than nail polish or creams. Doctors often prescribe medications such as terbinafine (Lamisil) or itraconazole (Sporanox). These drugs destroy the fungus, which you can't see on the inside, targeting the source of the infection. The infection can be cleared up in 6 to 12 weeks, but usually faster, with oral medications rather than topical medications. However, they are linked with possible side effects, including liver harm, and require administration under control by a well-being professional amid treatment.

3. Nail Fungus, Laser Treatment

Nail fungus treatment with lasers is a new, but common form of treatment. Targeting and destroying the fungus underneath the nail using a laser without harming surrounding tissue is just one of these methods. People who have not responded to topical or oral treatment can benefit from laser treatment. Often requiring multiple sessions, it’s a painless, non-medical process that involves absolutely no downtime. A disadvantage of laser treatment is that it can be pricey, and may not be covered by insurance.

4. Surgical Treatment

In milder cases, the infection rarely causes damage to the nail, but there are severe cases where the infection has seriously damaged the nail and doctors may recommend that the nail be surgically removed. This is normally a last-ditch effort unless other treatments don’t work or there is persistent pain from the infection. Following removal of the nail, a new nail will often grow back in its place, although usually not for a few months. This procedure does help to clear the infection, but only after recovery time and some risk.

Home remedies for nail fungus may work as a first step for a mild infection, but they can't match the science or effectiveness that medical treatments offer. Home remedies may get many people into thinking they’ve safely gotten rid of the fungus, but they don’t kill it permanently, and, especially in severe cases, they don’t work that well. They need to be used consistently over weeks or months and the success rate for them can vary greatly between people.

However, for more moderate to severe cases of nail fungus, oral antifungals, topical prescriptions or laser therapy will deliver more reliable and stronger results much faster. Nail fungus medical treatments are studied in clinical settings, conducted under a healthcare professional’s care, offering a safer, more controlled way to isolate and treat the fungus from your nails. Of course, these treatments can have side effects, and can also be more expensive, particularly for oral medications and laser therapy.

In the end, it will be a matter of how severe your infection is, your proclivity, and how fast you want the results. While you may wish to give some home remedies a try for mild cases, if you have an ongoing or serious infection, getting it treated professionally is your best bet for getting well.

Home Remedies For Nail Fungus Vs Medical Treatments: Making The Right Choice

When we cannot decide between home remedies and medical treatments for nail fungus, we should consider certain factors.

Many different factors go into the choosing of home remedies for nail fungus vs medical treatments, such as the severity of infection, your lifestyle, and personal preferences. Here are key considerations to guide your decision:

1. Severity of the Infection

In milder cases, home remedies such as tea tree oil or soaks with vinegar can even help, provided you stick to them regularly. The primary issue with laser and prescription drug treatments for the first two is that they are both slow and unreliable, but moderate to severe infections require professional intervention with prescription drugs or laser therapy for faster and better results.

2. Time and Patience

Most home remedies take weeks or even months of daily application before they show any visually recognizable improvements. If you’re in search of faster results, you could try medical treatments such as oral antifungal medications or laser therapy.

3. Safety and Side Effects

Often, natural remedies are safe, but that doesn’t mean they’re always effective when curing stubborn infections. However effective medical treatments do have side effects. For example, oral medications may affect liver function, and you may have to be monitored. Make the decision considering your overall health.

4. Cost and Accessibility

Luckily, home remedies are inexpensive and easily accessible and are good for mild cases. Laser therapy and prescription drugs can be costly and even require multiple visits to a clinic.

5. Underlying Health Conditions

Medical treatments should be prioritized by people with diabetes, weak immune systems, or circulation problems. In more serious cases, nail fungus can become a real nightmare and professional treatment is a must.

6. Long-Term Results

Home remedies can suppress symptoms temporarily but can’t eliminate the fungus. More successful and longer-lasting are medical treatments such as laser or oral therapies.

By balancing all these, you can select the most appropriate way to cure the nail fungus.

 Why Choose Revitalize London?

If you are suffering from toenail fungus, you need to select an experienced professional with whom you feel trusted. Revitalize London specializes in providing advanced treatments that treat toenail fungus at its foundation. Here’s why Revitalize London is the best choice for your toenail fungus treatment:

Advanced Laser Therapy: Our laser treatment fights the fungus from affecting your skin without destroying it. With our laser technology, you get a speedy, effective solution that needs little downtime.

Personalized Care: In fact, every patient’s needs are different, and at Revitalize London, that’s exactly what we have learned. We tailor treatments for your specific condition so they produce the most effective results.

Proven Success: We have years of experience treating toenail fungus and can typically achieve an excellent success rate with our patients consistently being satisfied with the results.

Comprehensive Support: At every step of the treatment process, we lead you through and care for your comfort and well-being as we enable you to recover.

Turn to your recognized provider Trust Revitalize London as a safe, effective, and professional solution to toenail fungus.

Conclusion

Although toenail fungus can be a frustrating, persistent condition, you don’t have to let it affect your life. If possible, take action as soon as you suspect a fungus in your nail. Home remedies for nail fungus, or even some professional medical treatments, work best if you attempt to prevent the infection from getting any worse. You’ll find Revitalize London to be offering the best solutions when you are looking for a safe, effective, tailored treatment with proven results. Don’t let toenail fungus take you out — but get started with healthier, fungus-free nails today. Consult with Revitalize London and allow us to provide you with your confidence!

Read more...

Toenail Fungus Treatment Clinic: Effective Solutions for Healthy Nails

Toenail Fungus Treatment Clinic

A lot more than a cosmetic concern, toenail fungus can cause embarrassment, and discomfort and alter your confidence. If your toenails are discolored thickened and, even worse, brittle, you may have toenail fungus. A common condition, but it’s something that can become embarrassing quickly, particularly if you are in public or sandals. However, toenail fungus has more to offer than simply looks because it may also be painful and even uncomfortable, making it hard to walk or wear any shoes.

Toenail fungus is usually painless, but if left untreated, it can spread, grow worse, and turn serious health problems into a bigger issue. That’s why it’s important to consult with a toenail fungus treatment clinic. Getting professional treatment will clear up the infection, but it’ll also help your nails get back to full health and you feel like you used to.

In this write-up, we’ll break down everything you need to know about toenail fungus: We will be covering, what causes it, how to spot the symptoms, and most importantly, what the best treatments are. If you are wondering whether to treat toenail fungus or just curious about your options this will talk you through what you can do and why a visit to a toenail fungus treatment clinic is the most effective option for lasting relief.

What Is Toenail Fungus?

Onychomycosis, or toenail fungus, is an infection that develops under your toenail. It’s due to many types of fungi such as dermatophytes, yeasts, and molds. All warm, moist places make these fungi happy, especially inside your shoes on your feet. If you’ve ever walked barefoot in a public pool or have gone sockless for any length of time in wet shoes, you might have unknowingly taken the first step toward developing this nasty infection.

Toenail fungus is often considered a cosmetic problem, but you need to know that it can cause more problems than you can think of. If the infection is left untreated, it can make your toenails thick, brittle, and yellow. In some cases, the fungus can make your nail lift off from the nail bed, causing pain and difficulty when walking. Toenail fungus is something many people think is only an older adult problem or something that will just go away on its own. That’s not necessarily true—it can happen to anyone and, if you don’t treat it, it will spread and worsen.

Then, how can you tell that you have toenail fungus? Signs to look for are yellowing, white spots on the nails, and thickened, or crumbling edges of the nail. Even sometimes there can be some bad smell. If your problem looks like toenail fungus, make sure to tell it apart from back foot dandruff or any nail injuries. If you’re unsure, a toenail fungus treatment clinic can help you determine what you’ve got and recommend the best treatment for your nails to get healthy again.

Why Do People Treat Their Toenail Fungus Early? 

Prevent Permanent Damage

If you see the early signs of toenail fungus, don’t put off treatment. The problem can get worse if ignored. If left untreated, toenail fungus can make your nails permanently damaged and lead to pain and itching. The fungus can sometimes spread to other toes or to the surface of the nail, where it's harder to treat.

Avoid Pain and Discomfort

On the cosmetic front, however, toenail fungus can be bad: it will make your toenails look ugly! However, the problem is also about pain and discomfort. If the infection spreads, your nails may become thick and uncomfortable to walk or wear shoes. The infection can increase the risk of injury to your nails, making the problem worse. If the fungus affects your nail bed, it can be swollen and irritated and cause you more pain.

Protect Your Health

Treating toenail fungus early actually helps prevent the infection from spreading deeper or getting into other areas of your body. An example of someone at a higher risk of toenail fungus complications is people who have diabetes or a weakened immune system. If the infection is left untreated, it may spread throughout your body and cause serious health problems.

Save Time and Money

And early treatment means you can sidestep those longer, more expensive treatments down the line. A toenail fungus treatment clinic can help you get rid of the infection quickly, giving you relief before the infection gets too far along. The sooner you act, the better your chances of getting your nails healthy again without the invasive procedures.

 Effective Toenail Fungus Treatment Clinic

 If you have a fungal nail infection, you can get rid of it with the right treatment and return your nail to good health. If it’s a mild infection or something more severe, there are several treatments available. Now, let's examine effective toenail fungus treatments and how a toenail fungus treatment clinic uses advanced elements and techniques to care for you.

Toenail Fungus Treatment Clinic

Topical Treatments: Quick and Simple Solutions

Toenail fungus is usually treated with topical treatment when the infection is mild. Antifungal creams, ointments, and lacquers that you apply directly to infected nails are also used to treat these conditions. The ingredients in them are terbinafine or ciclopirox which are used to target the fungus and prevent its spreading.

Topical treatments are amazing, as you can use them at home. Although it takes time—time usually several months—with results. The reason is that they will only reach the outermost portion of the nail; that is, they may not be reaching the deepest layers where infection actually lies. 

Although they aren't the fastest fix, topical treatments are a decent place to start in treating toenail fungus. If the case is mild they can be enough to clear up the infection and help your nails recover. If you don’t see results, however, the toenail fungus treatment clinic may recommend alternative methods.

Oral Medications: Stronger, Faster Relief

Oral medications are usually suggested for more serious cases of toenail fungus. Taken by mouth, terbinafine (Lamisil) and itraconazole (Sporanox) are taken to attack the infection. They are in your bloodstream, circulating around and directly hitting the fungus, killing it from within.

Treatment with an oral antifungal is usually more effective than topical treatment since an oral antifungal can reach the nail more effectively, which is where the infection is likely hiding. Side effects, however, can include liver damage or digestive issues. This is why it’s so necessary to take them under the supervision of a healthcare specialist, primarily while seeing a toenail fungus treatment clinic.

While you receive the treatment, your doctor will have to check your liver function to know if your liver is functioning well. Even though oral medications can be effective, it can take weeks or even months to achieve full results, however, oral medications tend to be the strongest and best way to get rid of a stubborn infection.

Laser Therapy: The Cutting-Edge Solution

One of the newest and most innovative treatments for toenail fungus is laser therapy. Using focused light, this procedure targets and removes the fungal cells deep within your nails. Because the laser can’t damage healthy tissue, you can resume normal activities after the treatment.

It is popular for laser therapy because it is quick. For most people, only one or two sessions, each approximately 20 to 30 minutes, are necessary. And the treatment is extremely effective with 80% success rates. In reality, many patients will notice improvements right from the first session.

If you’ve already attempted topical or oral treatments without success, laser therapy for your toenail fungus treatment at a toenail fungus treatment clinic may be your best bet. With side effects, it is one of the quickest fungus treatments available and an ideal solution for most who have a desire to destroy toenail fungus quickly.

Surgical Options: Nail removal is occasionally indicated.

Toenail fungus can be so severe in some extreme cases that a surgical procedure may be necessary. Surgery might be the best treatment if the infection has moved deep in under the nail or hasn’t responded to the other treatments. This may involve pulling off (avulsion), or removing part or all of the affected nail so that treatment to the nail bed underneath can be undertaken.

This is the most invasive but can be very effective. The fungus has no place to grow by removing the infected nail and you can treat the nail bed directly. A new, healthy nail may grow back in several months, and the fungus will disappear.

You may also experience some pain or swelling, but recovery from this type of surgery takes time. After your treatment clinic, your toenail fungus treatment clinic will work with you to ensure you recover the right way. Usually, this is reserved for severe cases which aren’t responding to other treatments.

Alternative Remedies: For mild cases, you can choose natural options.

Tea tree oil, vinegar soaks, coconut oil… there are many people seeking home remedies for toenail fungus. These remedies are less effective than professional treatments, but they do have the ability to help control mild cases or provide a short-term cure.

For example, tea tree oil has natural antifungal properties that may help the fungus die. However, it can be slow to produce results and is usually only partial. Another popular remedy is a vinegar soak because vinegar’s acidity can produce a hostile milieu for fungi. Yet, vinegar doesn’t go deep enough into the nail to rid infections that are more difficult to remove.

These home remedies may help if you have a mild case of toenail fungus. However, if you want to address toenail fungus faster to achieve long-term results, you should visit a toenail fungus treatment clinic for professional care. Proven treatments, including laser therapy, oral medications, topical antifungals, and more, have proven much more effective than home remedies in our clinics.

Toenail Fungus Treatment Clinic

That’s why professional treatments will play a key role.

At-home remedies and over-the-counter treatments may help toenail fungus in its early stages but are often not strong enough to clear stubborn or severe infection. Advanced toenail fungus treatments are available at a toenail fungus treatment clinic, such as laser therapy, oral drugs, and surgical methods that would help clear your toenail infection fast and efficiently.

If the professionals at a toenail fungus treatment clinic see your infection, they will run an assessment of the severity of your infection to decide on which treatment is best for you. That way they can track your progress and change course, if needed, to optimize your results. And with access to the latest technology and medications, you’re going to have better results.

Toenail Fungus Prevention Tips 

After you clear out the toenail fungus, you need to do what you can to keep the fungus from ever returning. The fungus can be maintained away from healthy nails through prevention. The good news is then there are some simple habits and lifestyle changes you can do to keep toenail fungus away. Now that you know toenail fungus treatment methods, let’s see some essential toenail fungus prevention tips that can be easily included in your daily routine.

Daily Hygiene Habits: Clean and Dry Feet

Keeping your feet clean and dry is the best way to prevent toenail fungus. Because fungi enjoy warmth and moisture it’s important to wash your feet every day using soap and water. Make sure you dry your feet completely, especially between the toes where moisture can collect and a breeding ground for fungus occurs.

Once you visit a toenail treatment clinic, the experts will emphasize the importance of good foot hygiene. By integrating this in your day-to-day activities you defend yourself considerably from fungal infections.

Choosing the Right Shoes: Material and Fit Matter

What you choose to wear on your feet will also help prevent toenail fungus. When the shoes are too tight or are made of non-breathable materials like plastics, or shoes that don’t dry properly after being wet then you are creating an environment where moisture and heat are trapped, resulting in an ideal circumstance for fungi to grow. Shoes made of breathable material such as leather or mesh will keep your feet dry.

Also, make sure that your shoes fit right. If you’ve got tight shoes, the trauma caused to the toenail can become an entry point for fungi. When buying shoes, they must allow some space for the toes to freely move.

If you are someone who is more prone to toenail fungus, it’s smart to rotate your shoes so that the other pair gets some airflow in between. If you're still wondering if your shoes are helping the situation then it’s preferable to get a suggestion from a toenail fungus treatment clinic.

Lifestyle Changes: Sweat Less, Stay Healthy

However, lifestyle habits are big players too in how we prevent your toenail fungus. If you are active or if you tend to sweat a lot, be sure to change out of your wet socks and shoes right after physical activity. Damp sweaty conditions are heaven for fungi, so drying your feet and putting on fresh socks will reduce the opportunity of infection.

Going to the gym? If in a locker room or shower shared with others, consider wearing flip-flops to avoid fungal spore contact. If you tend to sweat excessively, talk to your doctor about options for controlling excessive sweating, which can increase your risk of fungal infection.

Prevention also depends on keeping your immune system healthy, as well. All this helps in keeping a strong immune system. The stronger the immune system, the better it can fight off infections such as toenail fungus. Your toenail fungus treatment clinic may also suggest some lifestyle changes to help prevent future recurrences such as managing your stress and sleeping better.

Maintaining Healthy Nails: Keep the trim short and stay safe.

If your toenails are trimmed and neat, healthy nails won't get infected, so it's important. Keeping your nails trimmed regularly will help to stop them from getting caught on shoes it will both cause trauma and leave an opening for fungi to enter.

To avoid ingrown nails, be careful when you trim your nails—cut them straight across, and don't chop too far into the corners when you cut. If you’re not sure about how to trim your nails safely, go to a toenail treatment and fungus clinic. They will show you the right way to care for your nails and point out common things to avoid.

 Why Choose Revitalize London Toenail Fungus Treatment Clinic? 

You are looking to receive the best toenail fungus treatment out there. As seen at Revitalize London, we offer the best, most effective solution for your situation. At our team, we’re devoted to providing the best standard of care so you can get healthy and fungus-free nails soon enough.

State-of-the-art treatments are what we use. Our treatments are capable of completely eliminating toenail fungus with a minimal amount of pain and relatively quick healing. At Revitalize London we do not believe that every case is the same; that is why we take the time to create each patient's treatment plans based on their individual lifestyle.

Not only do we earn their trust that we know what we are doing, but they trust us in the way we care for them. We’re the toenail fungus treatment clinic that offers safe, lasting results with proven success rates and a history of happy patients. Tune us in and book your consultation to get started on your journey to healthier nails!

Read more...
Please enable JavaScript in your browser to complete this form.